As a part of preparation for monitoring our WIndows Server 2008 R2 using SNMP and Nagios we had to add SNMP Services to few systems which didn’t have it yet. So, based on that fact I thought it might be nice to capture all steps involved in adding SNMP to Windows Server machine. Here you can see steps, screenshots and short description how to achieve that.
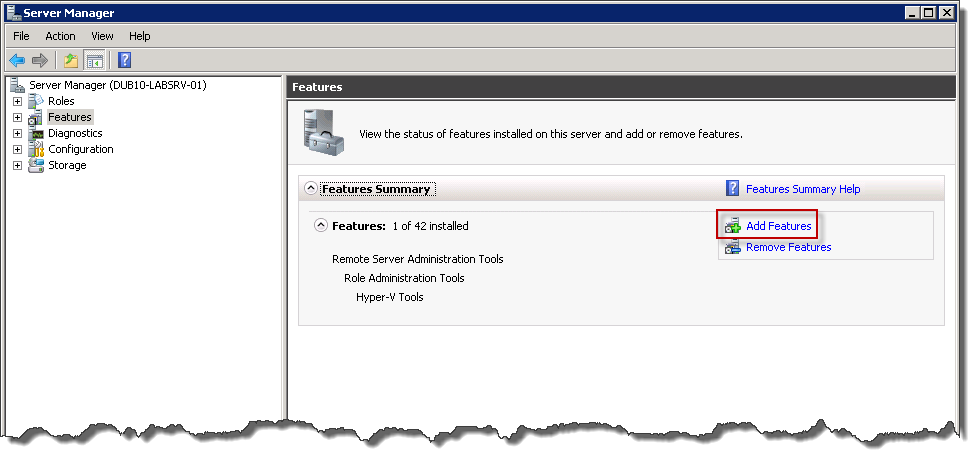
Start Server Manager and go to Features and then click Add Feature
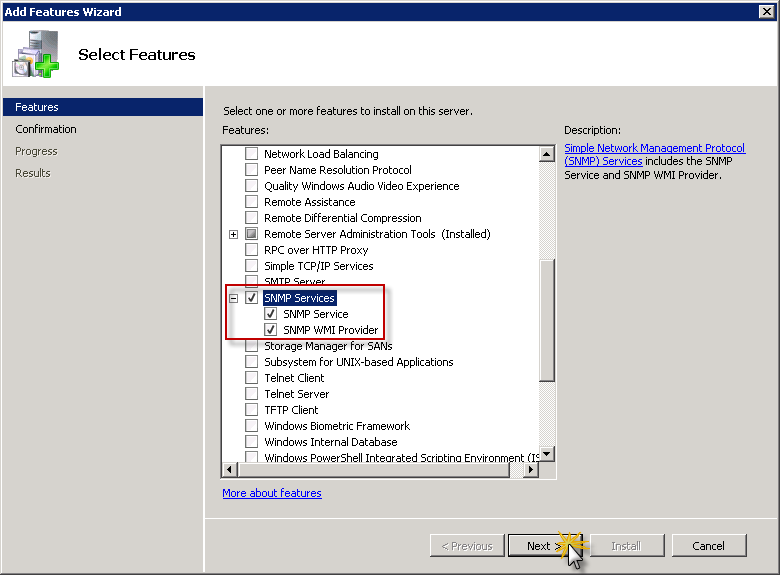
After Add Features Wizard will appear on the screen locate SNMP Services section and add this feature to installation list by ticking checkboxes next to appropriate services on the list as shown on screen below. Then click Next to proceed.
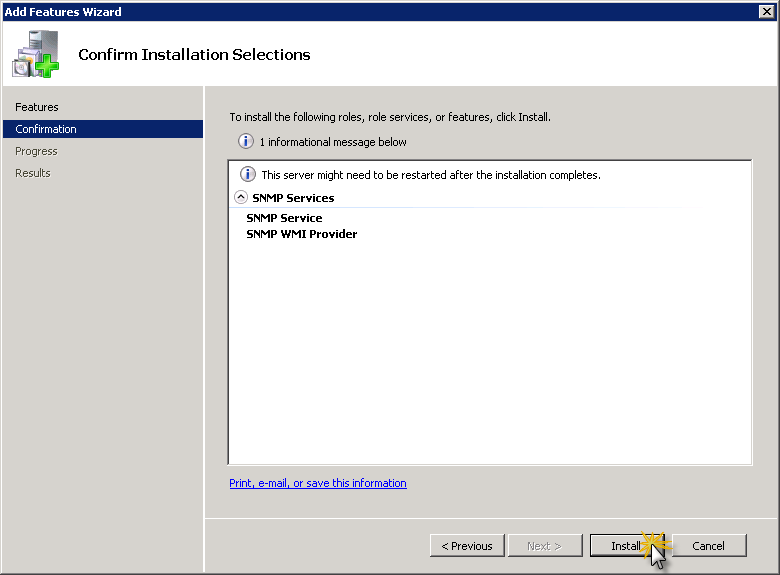
Summary screen will show what services will be installed. Click Install to proceed with installation.
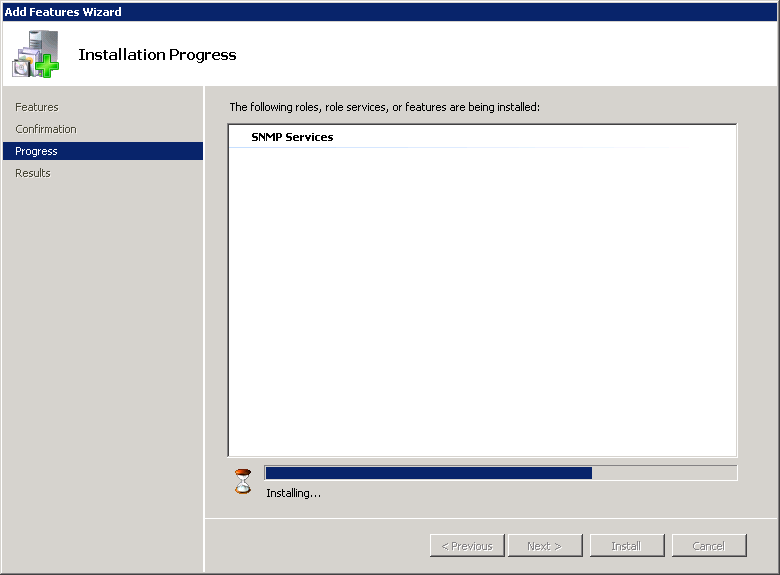
Installation progress will appear once server will be adding desired features to system configuration.
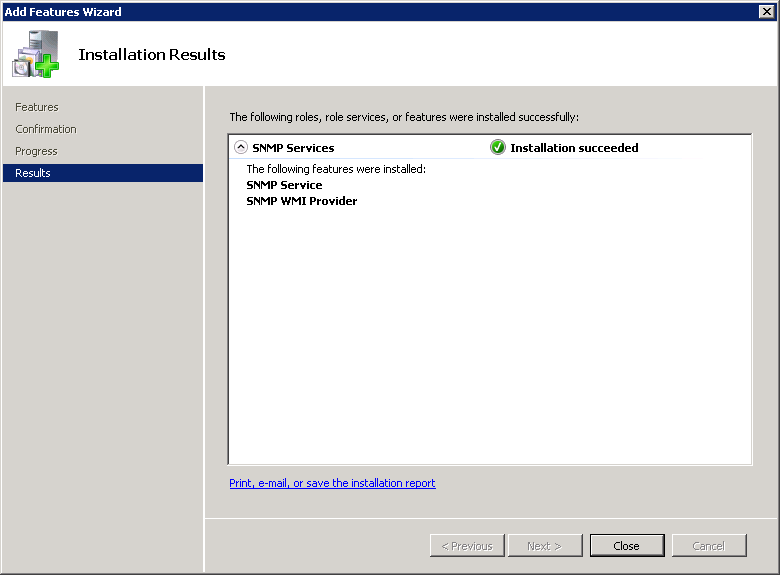
Once additional components will be installed, summary windows will show what features were installed and if installation was successful. Click Close to to finalize Add Feature Wizard.
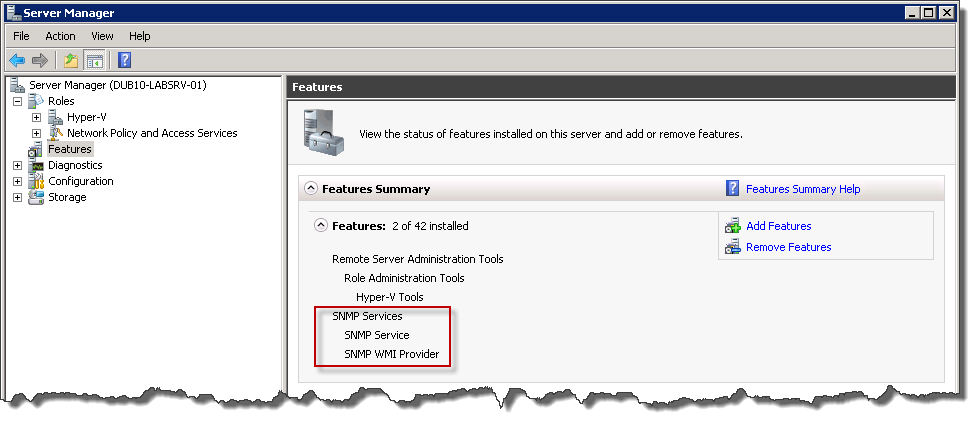
Now in Server Manager in Features section you can see that SNMP Services are listed as installed components.
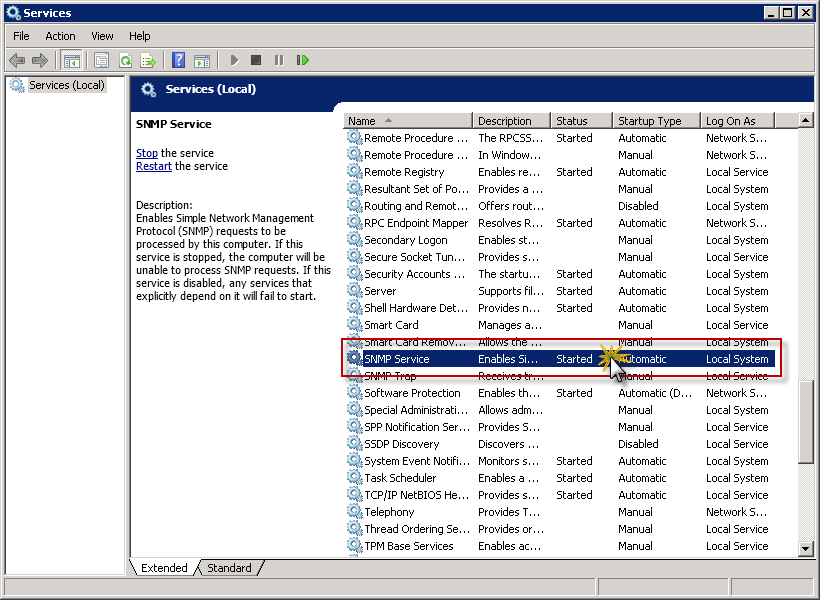
It’s time to configure SNMP for serving information to monitoring system, which in our case is Nagios. In order to set parameters on SNMP go to Start / Administrative Tools / Services and then locate SNMP Service on the list. Double click on it.
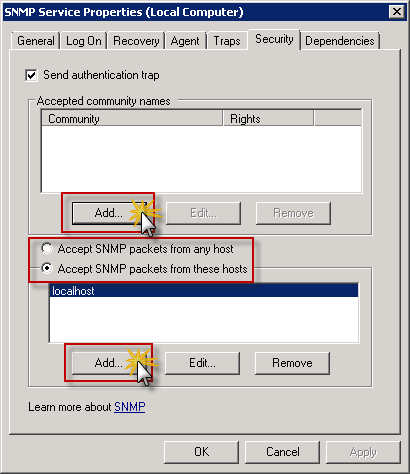
In SNMP Service Properties (Local Computer) window go to Security tab.
This is place where we can define parameters of SNMP Service:
- Community string – unique keyword which will be presented by monitoring system when accessing information on server via SNMP
- IP address of monitoring system – to narrow down computers which can poll information remotely from server
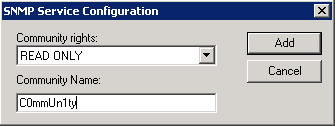
When you click Add in Accepted community names section you can enter Community Name and define Community rights. For us READ ONLY is required as we want to poll information from server only.
Available rights for community strings:
- NONE: Prevents this host from processing any SNMP requests.
- NOTIFY: Allows this host to send only SNMP traps to the community.
- READ ONLY: Prevents this host from processing SNMP SET requests. SNMP managed objects have default values specified by the agent. Some applications may request to modify these values with the SNMP SET command.
- READ WRITE: Allows this host to process SNMP SET requests.
- READ CREATE: Allows this host to create new entries in the SNMP tables.
NOTE: Make sure that Community Name parameter will NOT be any easy dictionary word. Think of it as a password to protect access to information about system.
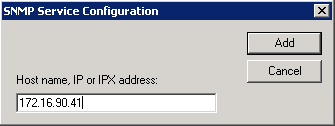
Once Community Name is define click Add in Accept SNMP packets from these hosts. That will allow you to add IP address of the server with monitoring system, which is Nagios in our case. It is highly recommended to narrow down list of IP addresses from which SNMP communication can be received by the server for security reasons.
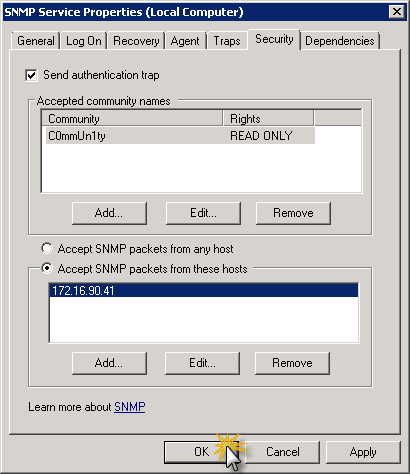
Once all parameters are configured you can see them in SNMP Service Properties (Local Computer) dialog windows and if everything is fine and according to expectations click OK to approve changes and apply those to SNMP Service.
From now on you can poll information using SNMP from certain IP addresses using Community Strings defined in SNMP Service configuration.

good stuff
Thank you for crisp and clear information.
Thanks.. Good one
IN SERVER 2008 64BIT , [LOG ON] TAB I CANNOT SEE PROFILE 1 TO ENABLE/DISABLE
PLEASE CAN YOU GUIDE
Hi Siraj,
Please use the following procedure which i have written. It took me two days to fix this.
How to fix SNMP in windows 2008 r2 core (Hyper-V)
See the list of features.
Dism /online /get-features /format:table
Now you can install for the SNMP Service:
Dism /online /enable-feature /featurename:SNMP-SC
Usually in GUI (Windows 2008) you can add public string and values through ‘services’ (security tab) in Server Manager but in core version sometimes it doesn’t give you ‘security’ tab option.
The work around is to add that string manually in regedit.
Run ‘regedit’ from the command prompt and go the following folder.
# HKEY_LOCAL_MACHINE\SYSTEM\CurrentControlSet\services\SNMP\Parameters
In my case I have installed Dell Openmanage essentials on a Windows 2008 R2 (GUI) system so I created a string in the folder ‘PermittedManagers’ under Parameters folder.
Value name =1
Value data = Server IP (Monitoring – Dell openmanage)
To assign public string we need to create a DWORD (32 bit) Value in the folder ‘ValidCommunities’
Value name = public
Value data = 4
That’s it.
To check that I am using Dell Troubleshooting tool
Regards,
Kashif
thx bro but how to configure SNMP in client windows 8
You have to go to:
Control Panel / Programs / Turn Windows features on or off.
Once Windows Features window will show up scroll down to:
Simple Network Management Protocol (SNMP)
Make sure checkbox next to it is checked. Then click OK and enjoy SNMP on Windows 8.
thank you very much…
Excelent!!! Thank you it was helpful!
Hi,
How do i see what version of snmp is being used in windows 2008 R2?
Go to Services, double-click on SNMP service and there you can see which version of SNMP has been setup on your server.
In case you want to see which version of SNMP is used to poll data from server you need to use Wireshark or Network Monitor tool to capture network traffic and based on content of packages you can see which version of SNMP has been used to communicate.