SQL Server 2012 has very nice HADR technology built-in, AlwaysOn Availability Groups. It allows to have multiple replicas of selected databases across multiple servers, which can be even located across multiple sites. AlwaysOn itself provides mechanism to keep all replicas of database synchronized and up-to-date, as some of them might serve data for read-only purposes (for example reporting).
MSDN article: AlwaysOn Availability Groups (SQL Server) describes AlwaysOn technology in details. In this article I will focus on practical side of this HADR technology and how to get this up and running fast without any issues.
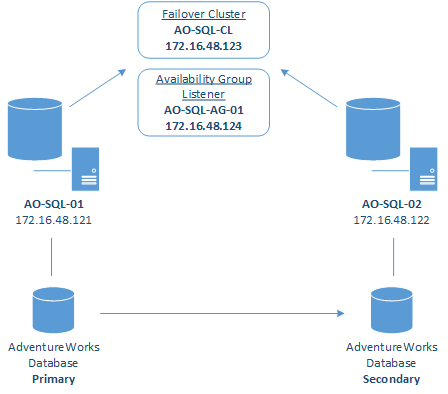
To test and demonstrate SQL Server 2012 AlwaysOn capabilities I built simple Lab environment on VMware Workstation as shown below. Lab contains 2 servers with Windows Server 2012 R2 Datacenter and SQL Server 2012 Enterprise.
In order to get SQL Server AlwaysOn up and running we will complete following activities:
- Install Failover Clustering Role
- Configure Windows Server Failover Clustering
- SQL Server installation
- Demo database preparation
- Enable Availability Groups on SQL Server
- Creating AlwaysOn Availability Group
So, let’s get started…
Install Failover Clustering Role
First we need to prepare operating system and it’s components to AlwaysOn deployment
AlwaysOn requires Windows Failover Clustering role to be installed and then configured on the server, so let’s add this.
In Server Manager go to Manage and choose Add Roles and Features.
Add Roles and Features Wizard will show on the screen. On the welcome screen click Next to proceed.

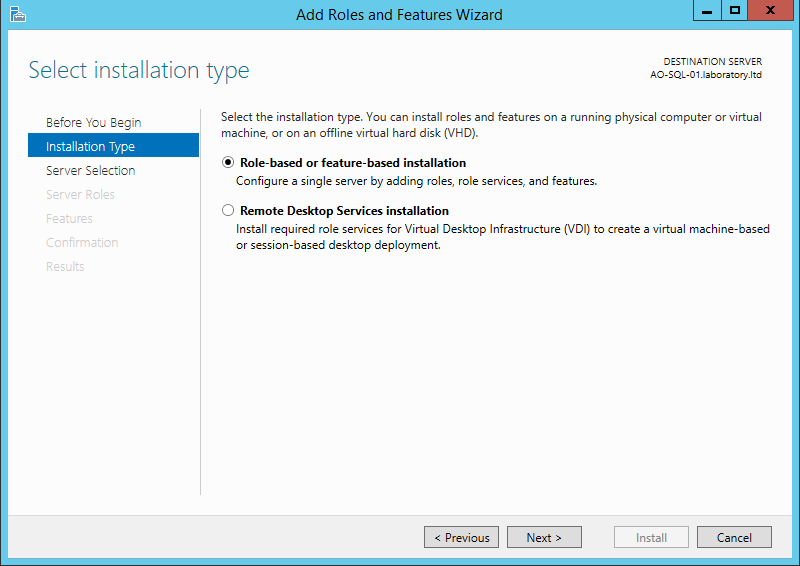
On Installation Type screen make sure Role-based or feature-based installation is selected. Then click Next to proceed.
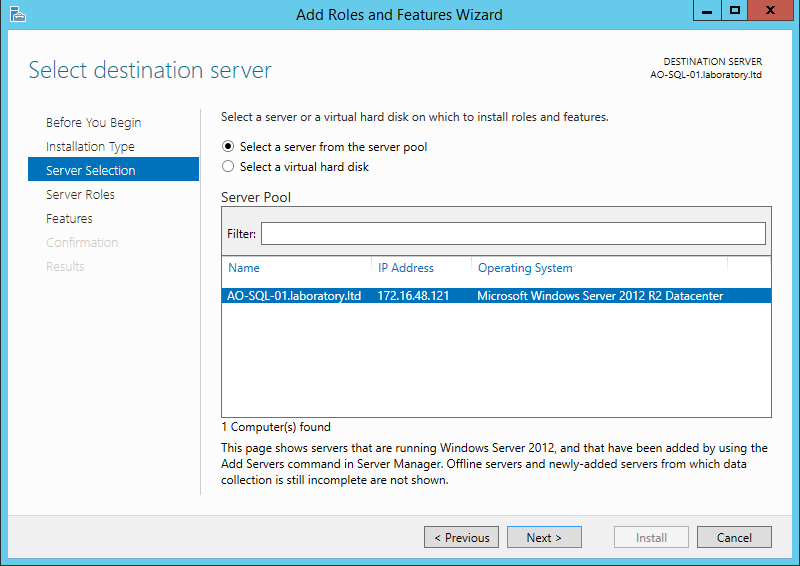
Now you can validate that installation will take place on appropriate server. Once confirmed click Next to proceed.
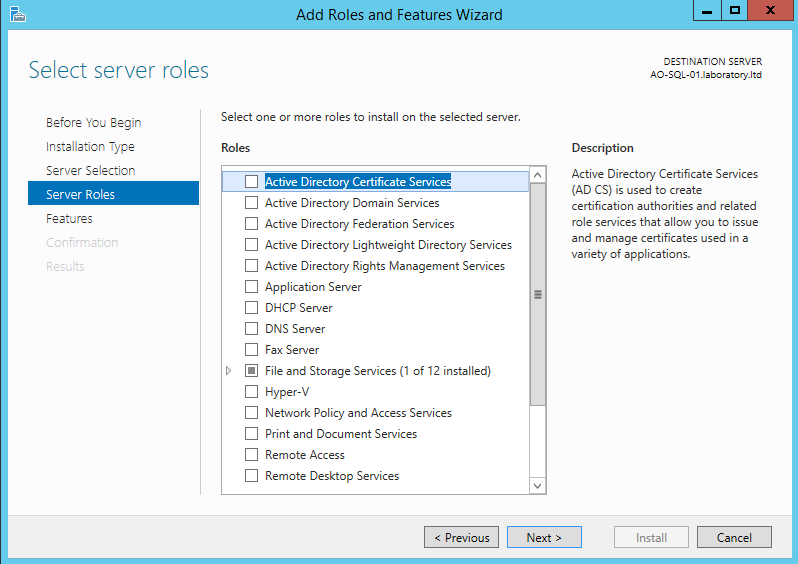
On Server Roles screen no changes. Just click Next to proceed.
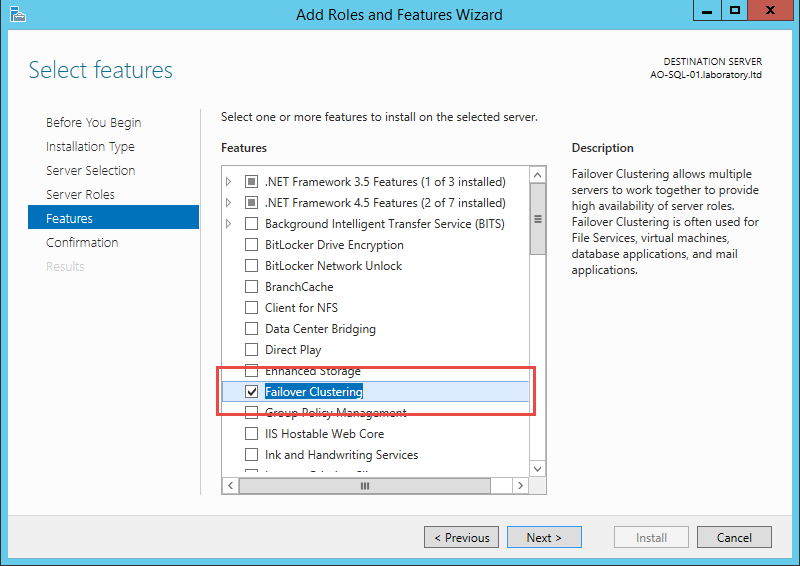
On Featured screen locate Failover Clustering and check the checkbox next to that feature. Then click Next to proceed.
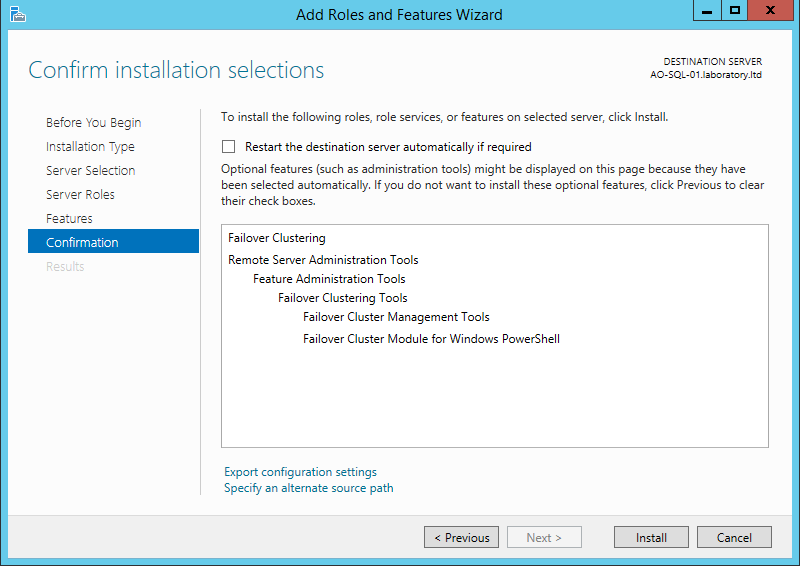
Then you can see tour choices on Confirmation screen. Once you verify that all required features are listed click Install to start installation process.
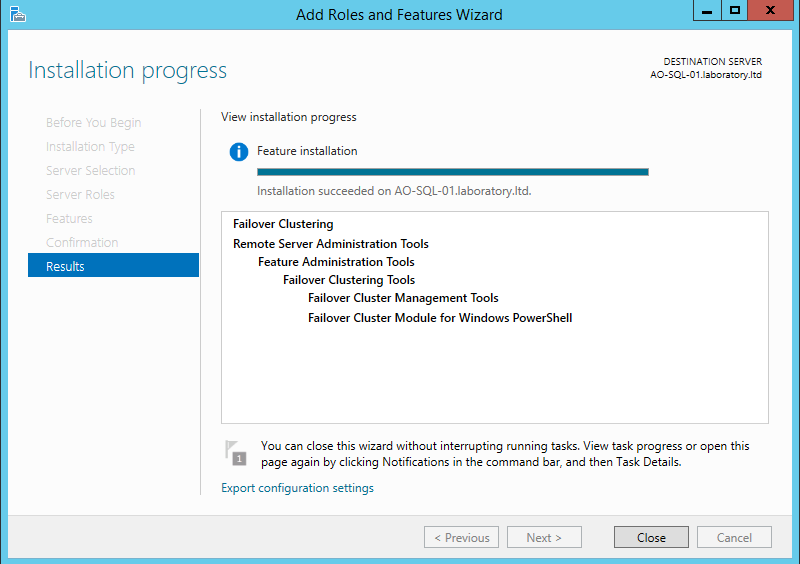
After a while Failover Clustering feature will be added to system. Click Close to finalize Add Roles and Features Wizard.
Configure Windows Server Failover Clustering
Once Failover Clustering feature is installed we can configure Cluster as this is required for AlwaysOn to operate.
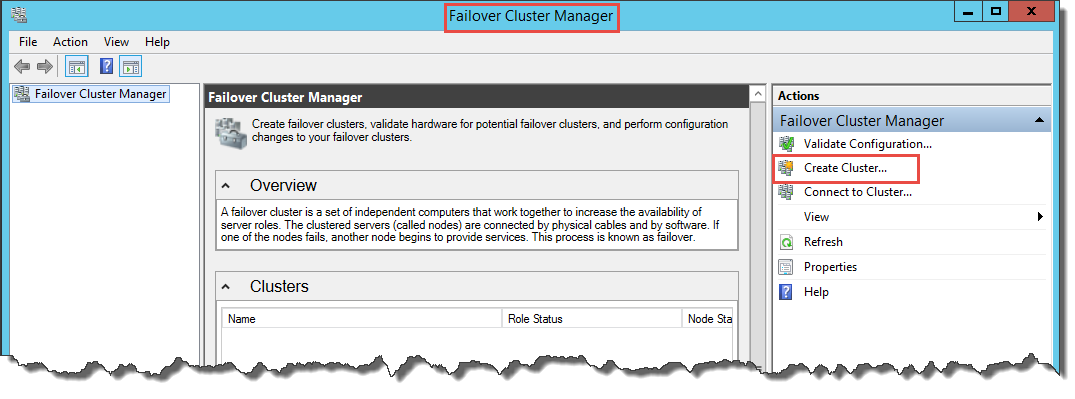
So, from Administrative Tools start Failover Cluster Manager.
Once started click on Create Cluster… on right hand side Actions list
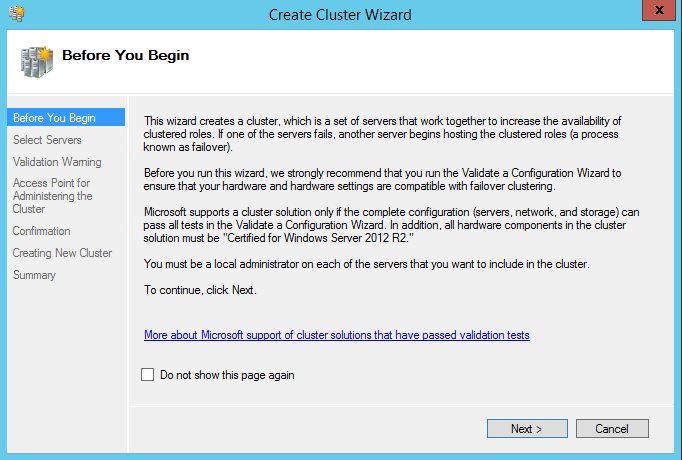
On the first screen of Create Cluster Wizard just click Next to proceed. It’s just welcome screen.
On Select Servers screen you can define all servers which will be part of cluster and will become Cluster Nodes.
Add both machines which will be part of AlwaysOn. In that case it will be AO-SQL-01 and AO-SQL-02.
Once both servers are added click Next to proceed.

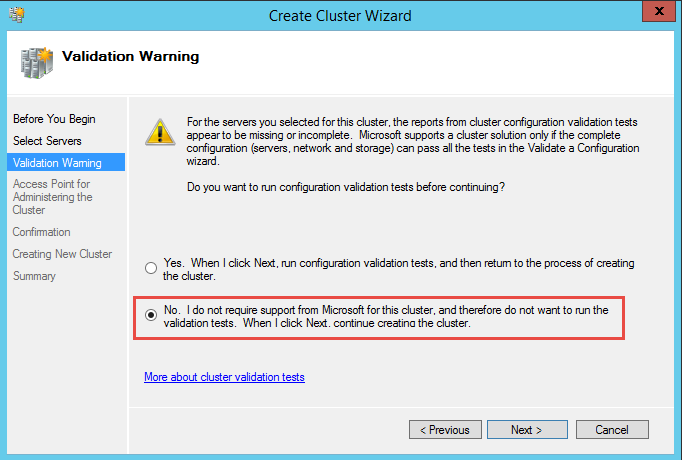
Now you will see Cluster Validation Warning. There is nothing to worry about. Create Cluster Wizard proposed to run validation tests. That is not required as our servers will fail Cluster Validation Test (no shared storage, no separate network for Cluster heartbeat – but this is not required for AlwaysOn).
So, on that screen choose No, I do not require support from Microsoft for this cluster, …. and click Next in order to proceed.
Now we need to name our cluster and assign IP address to it. That will be used for administering cluster.
Parameters I chose:
- Cluster name: AO-SQL-01
- IP address: 172.16.48.123
Then click Next in order to proceed.

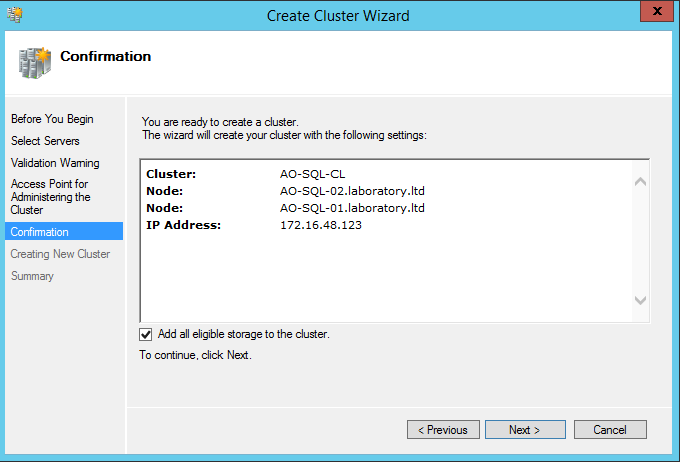
Now it’s Confirmation screen where you can see summary of cluster configuration.
Click Next to proceed with cluster creation.
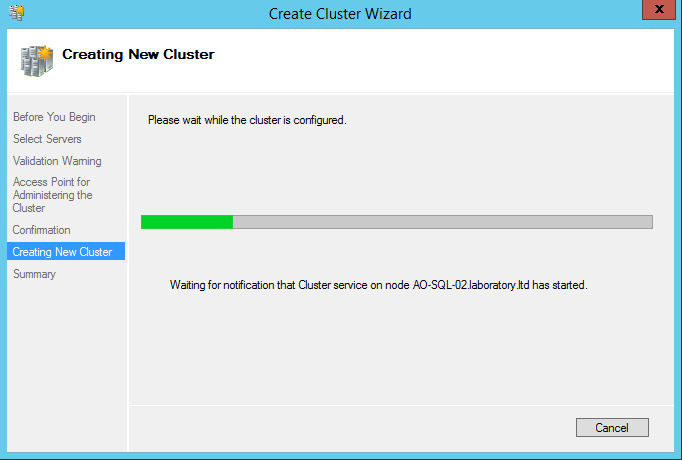
Now Create Cluster Wizard will configure Failover Cluster. It will take a while…
…and Summary screen will show results of creating cluster.
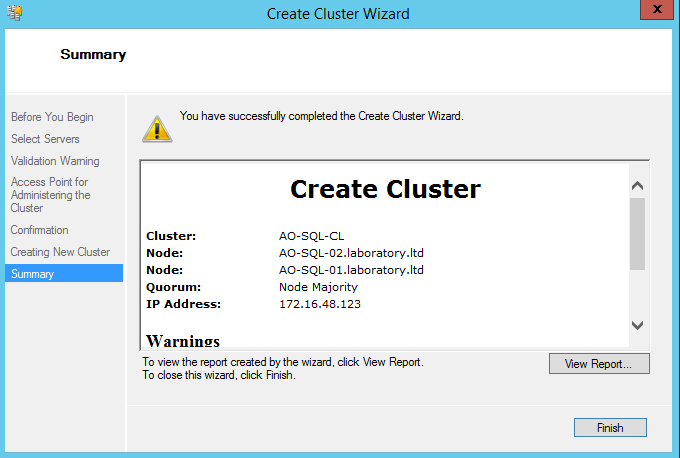
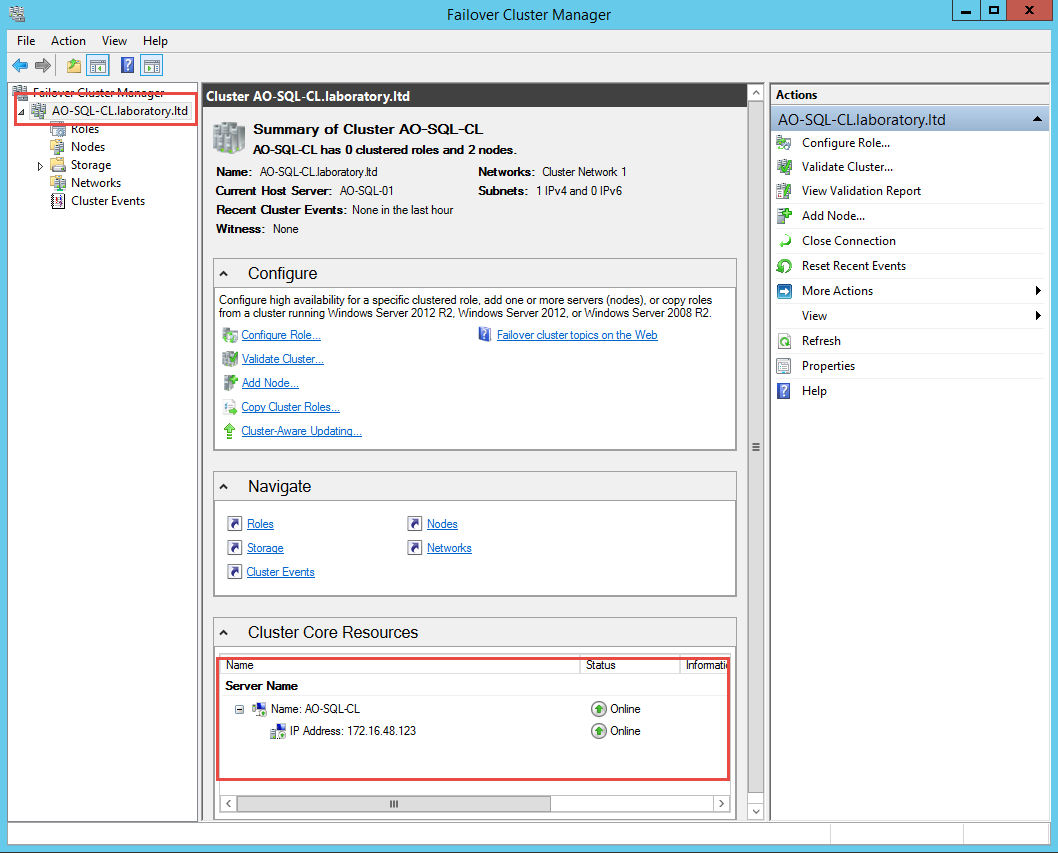
Once Failover Cluster has been created you can see results in Failover CLuster Manager.
There should be AO-SQL-CL cluster which you can expand and see:
- Roles
- Nodes
- Storage
- Networks
- Cluster Events
You can also see parameters of the cluster (name and IP address) along with current status in bottom part of Failover Cluster Manager.
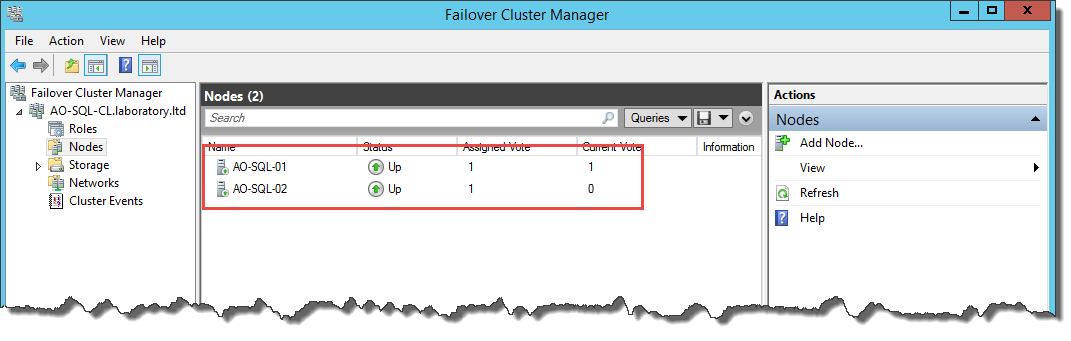
When you click Nodes container you can see all nodes of the cluster (in that case AO-SQL-01 and AO-SQL-02) and status (if node is up or down).
Once cluster is created, there is one more thing to do in Active Directory.
During configuration AlwaysOn will add Role to cluster. That role will be defined for Availability Group Listener.
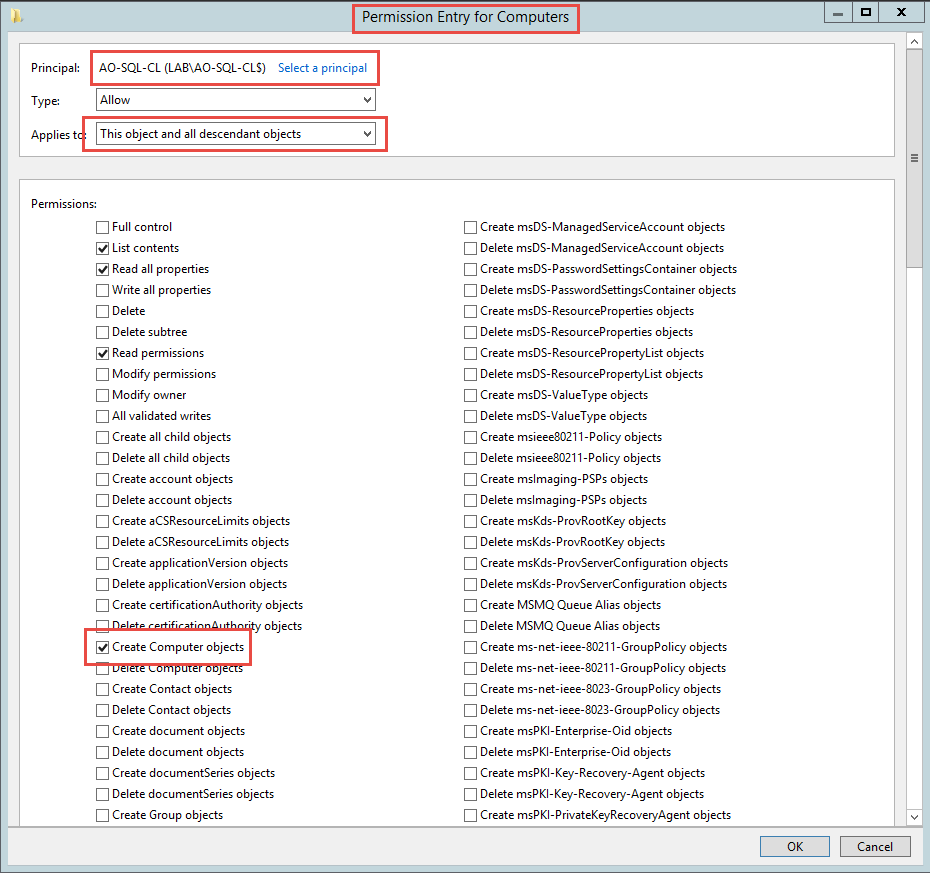
As a part of Role configuration cluster has to add computer account to Active Directory. To avoid issues with that now we will add permissions to Computers container, which will allow AO-SQL-CL to create computer objects.
In order to do that start Active Directory Users and Computers (by default that management console will be available on Domain Controller).
Once ADUC is started right-click on container or OU to which you want to modify permissions (in examples below I’m adding permissions to Computer container).
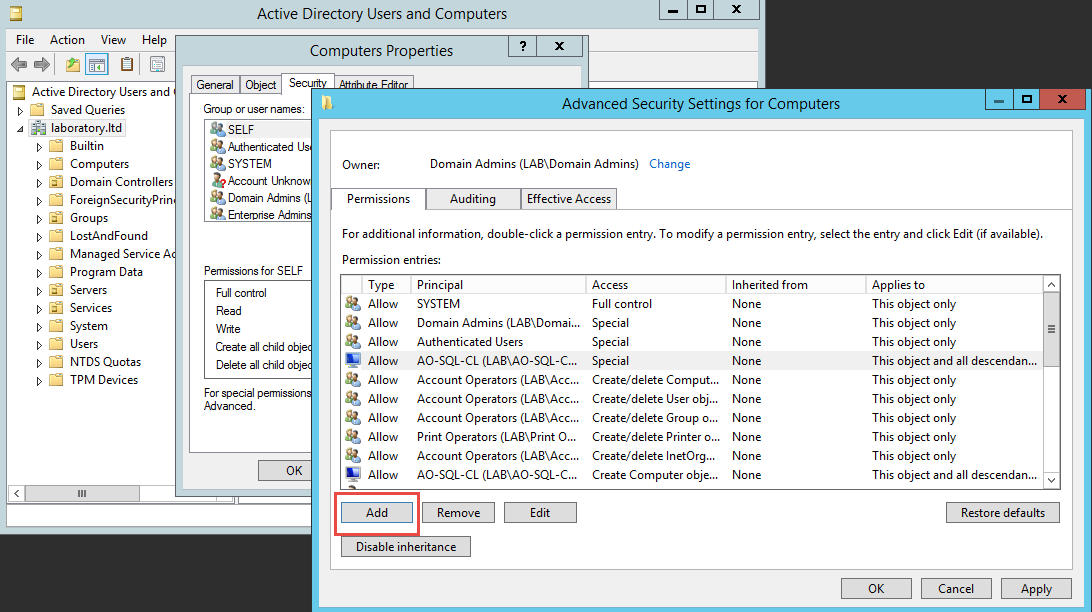
On Permissios Entry for Computers screen click Select a principal and add AO-SQL-CL. Then on list of Permissions locate Create Computer objects and check the checkbox next to that option.
Then click OK and at this stage we ready to move into SQL Server part of installation.
SQL Server installation
As we completed all preparation work on Windows Server side, now we can move to SQL Server installation.
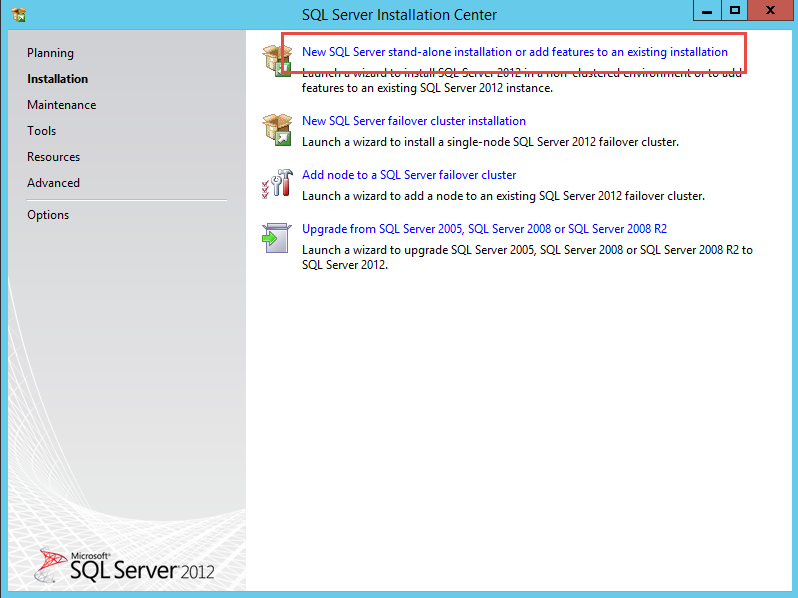
So, once SQL Server Installation Center starts click Installation.

Then, on Installation screen click New SQL Server stand-alone installation or add features to an existing installation.
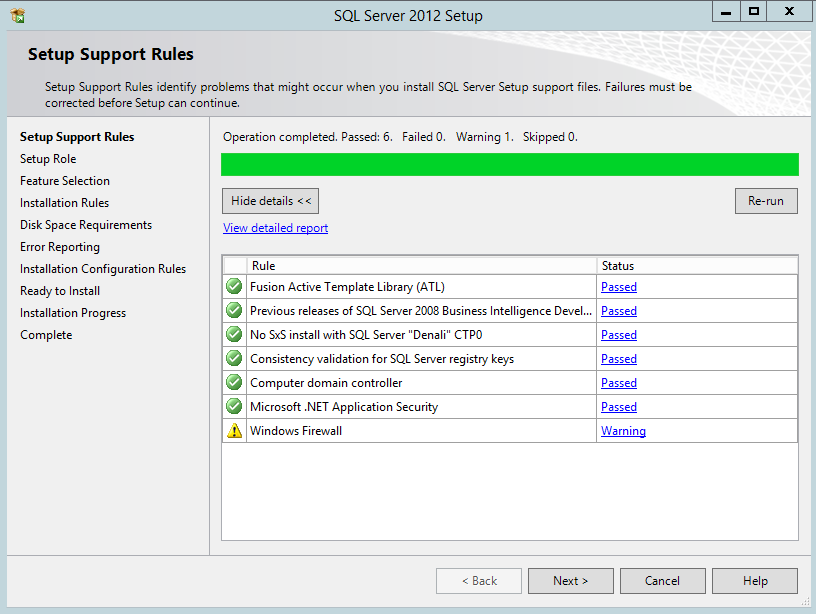
SQL Server 2012 Setup starts and performs some validation to identify potential issues with overall setup process.
If all Passed and no issues click OK to continue.

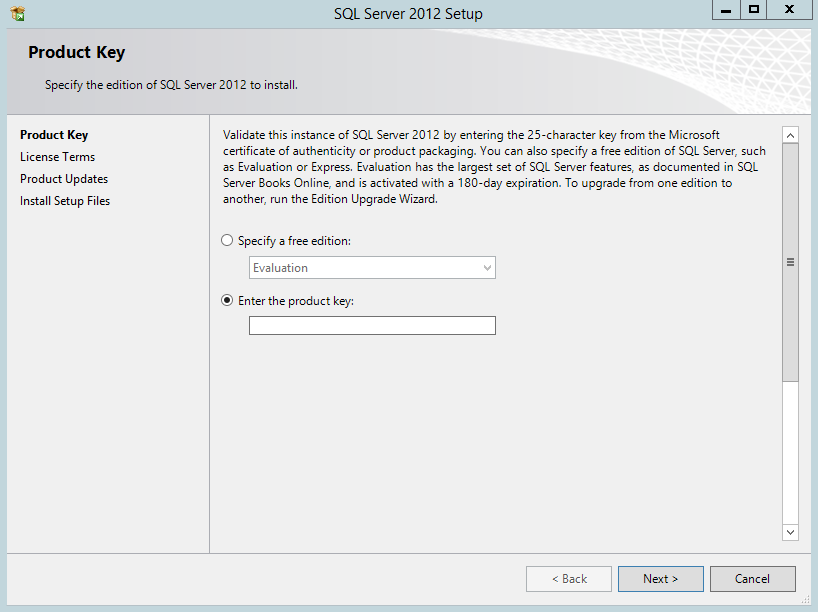
Then setup will ask to provide product key or chose evaluation mode. Depends how you want to install SQL (evaluation or licensed) choose appropriate option.
Then, click Next to proceed to next step.
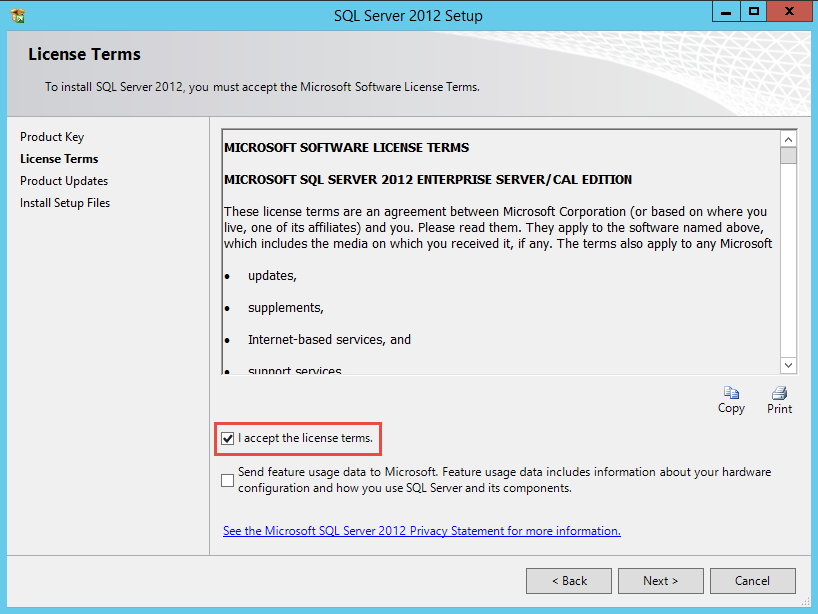
Accept license terms… and click Next…
Setup will perform more validation tests… once completed click Next to proceed…
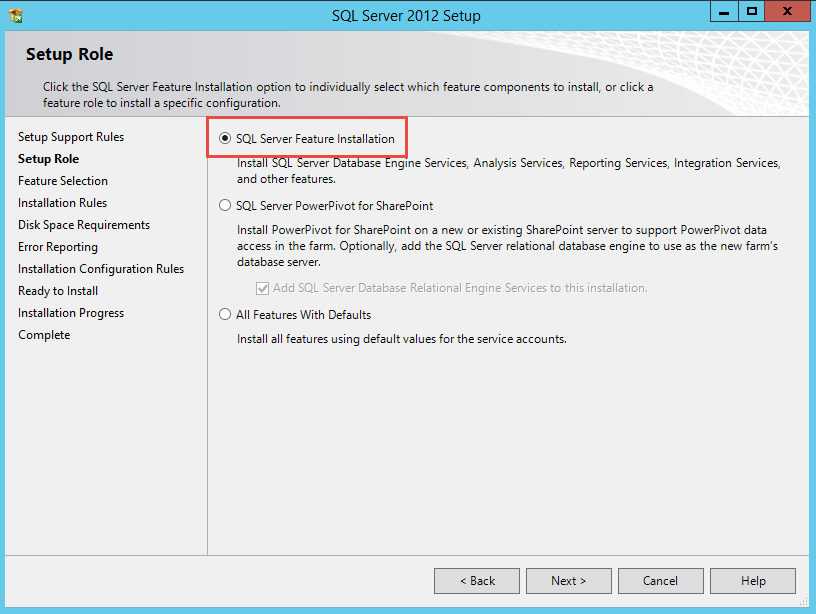
On Setup Role screen click SQL Server Feature Installation and click Next…
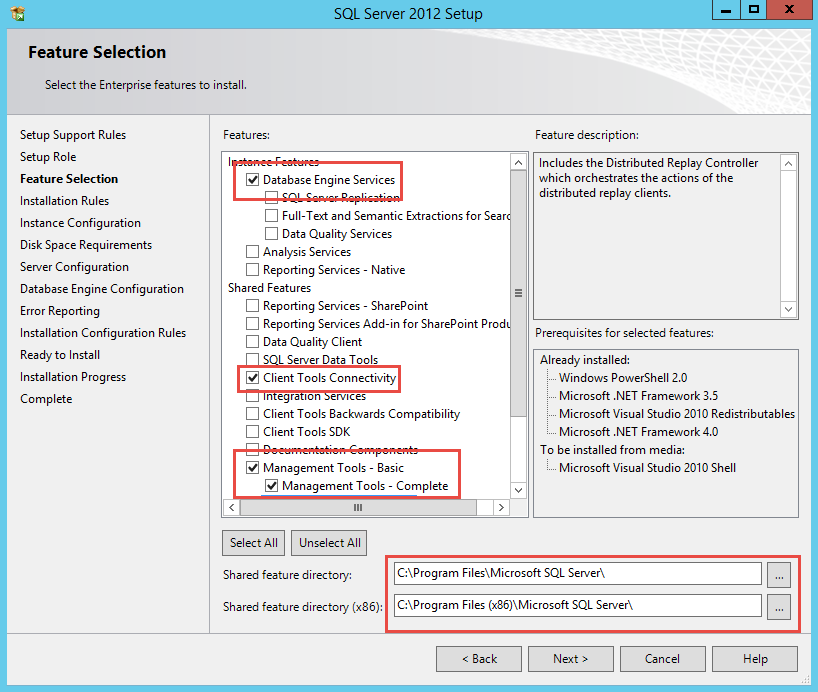
on Feature Selection screen choose:
- Database Engine Services
- Client Tools Connectivity
- Management Studio – Basic
- Management Studio – Complete
Also, if required, change location of Shared feature directory and Shared feature directory (x86).
Then click Next to proceed…
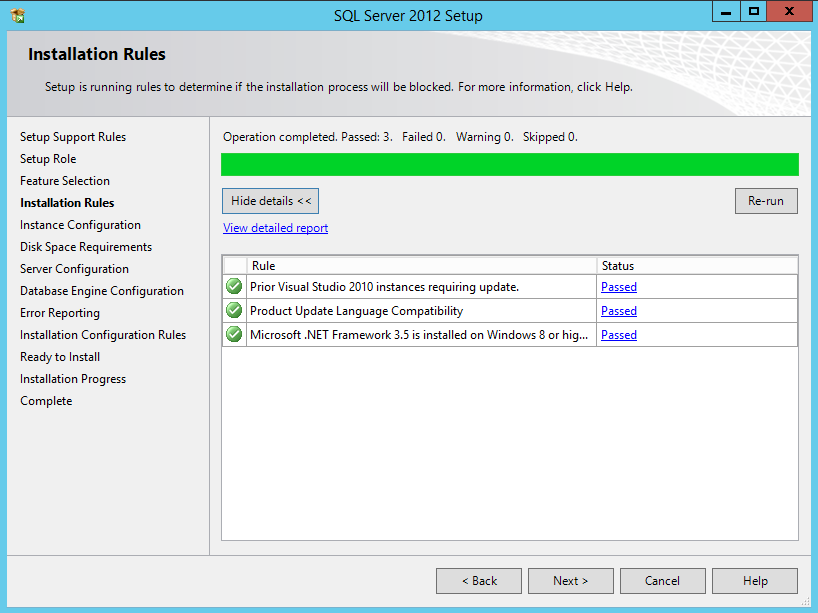
SQL Server 2012 Setup will perform few more validation tests.
Once completed with success click Next to proceed…
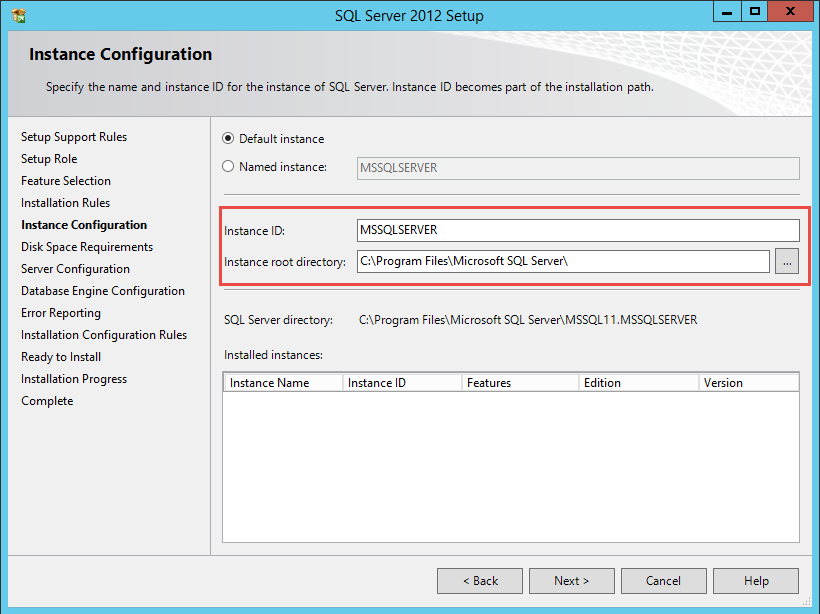
Now it’s time for SQL Server Instance configuration.
As I had no specific requirements in terms of instance name or location I just took default settings.
If you have to rename instance or place instance files on different drive, adjust default parameters and then click Next to proceed.
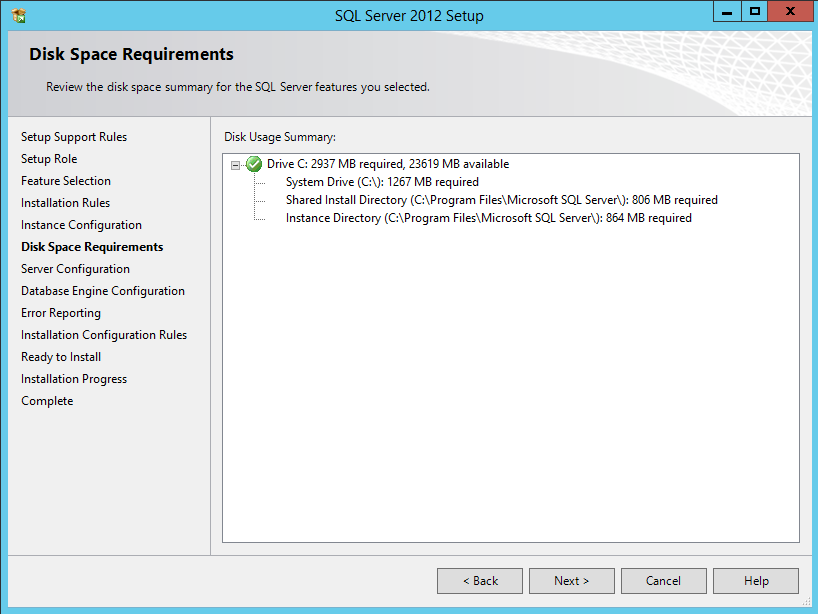
SQL Server 2012 Setup will show Disk Usage Summary for review.
On that screen click Next to proceed.
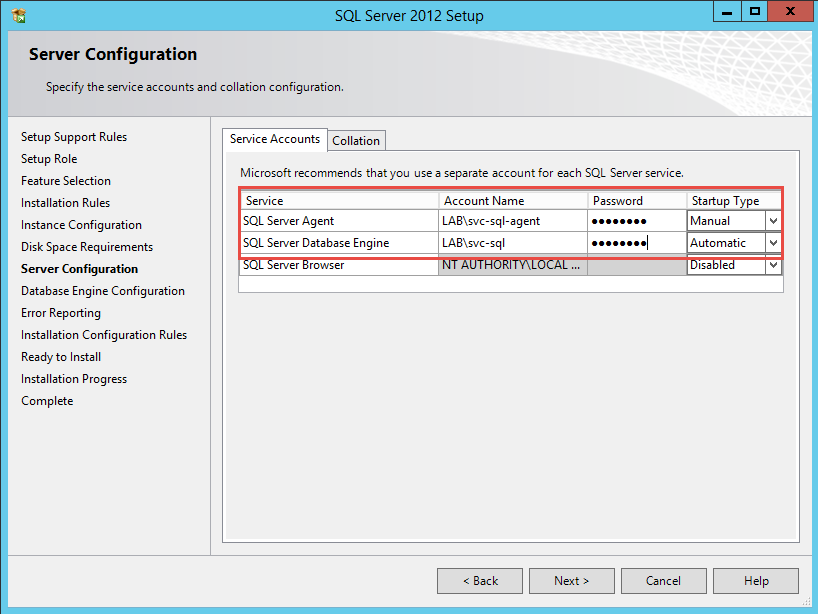
On Server Configuration screen configure accounts for particular services.
It is recommended to use domain account for that.
In my case I have two accounts created for SQL purposes in Active Directory:
- LAB\svc-sql – for SQL Server Database Engine
- LAB\svc-sql-agent – for SQL Server Agent
and these accounts are assigned to particular services.
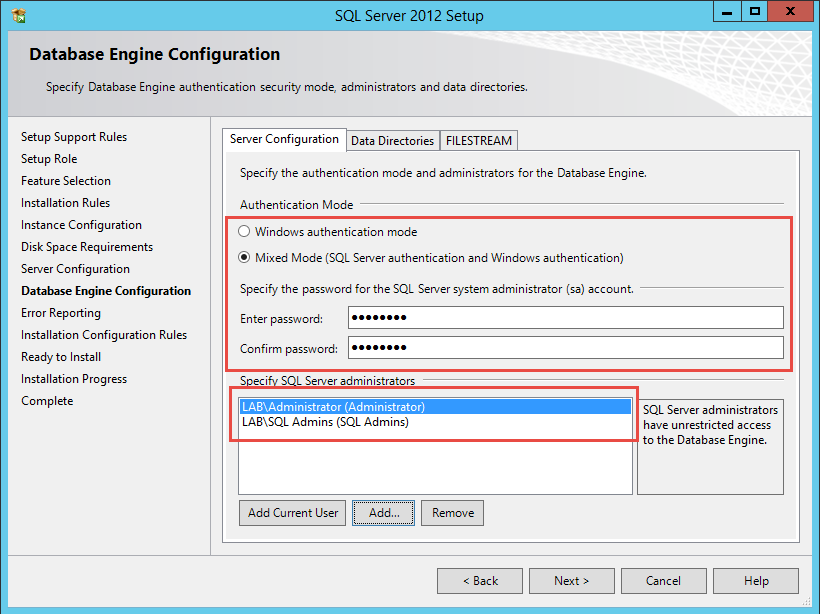
Now on Database Engine Configuration / Server configuration tab options to configure:
- Authentication Mode – I used to enable Mixed Mode – that requires to setup password for sa login, but does not limit connection to Domain-only accounts.
- Specify SQL Server administrators – I used to add domain administrator account and also have LAB\SQL Admins group in Active Directory which I add as SQL Server administrators.
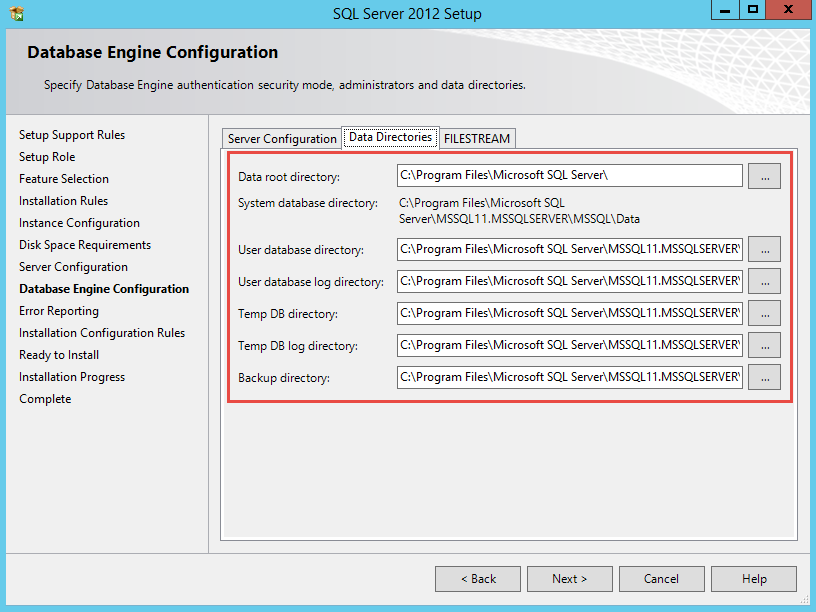
Now on Database Engine Configuration / Data Directories folders for data files and logs can be configured.
Once all parameters on Database Engine Configuration screen are set click Next to continue.
Now you can decide if you want to report any errors to Microsoft… and then click Next to continue…

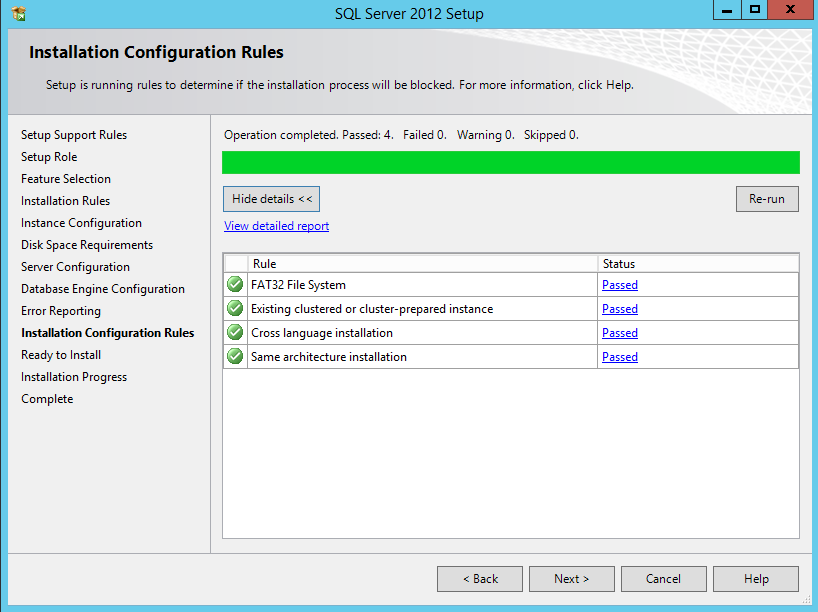
Now SQL Server 2012 Setup will do one more check… if all steps Passed, click Next to proceed…
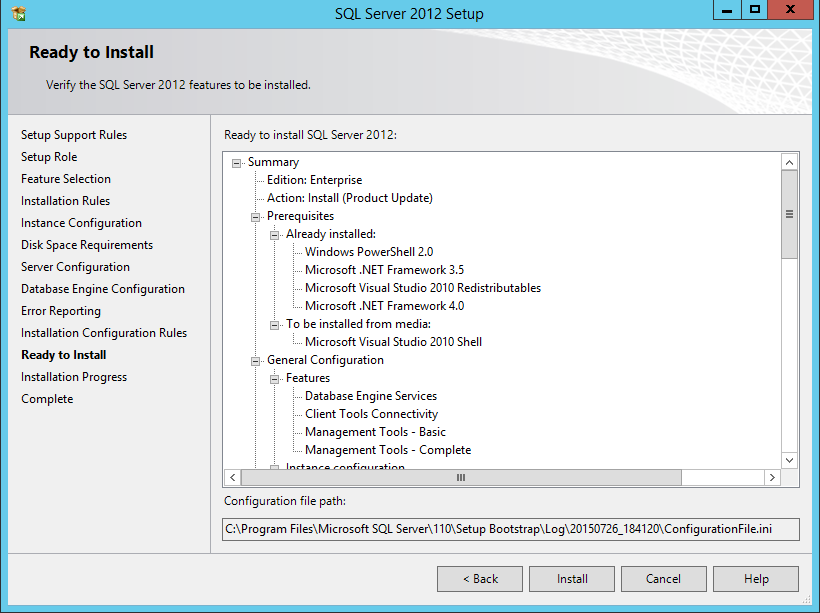
Ready to Install screen shows summary… now click Install to start installation process.
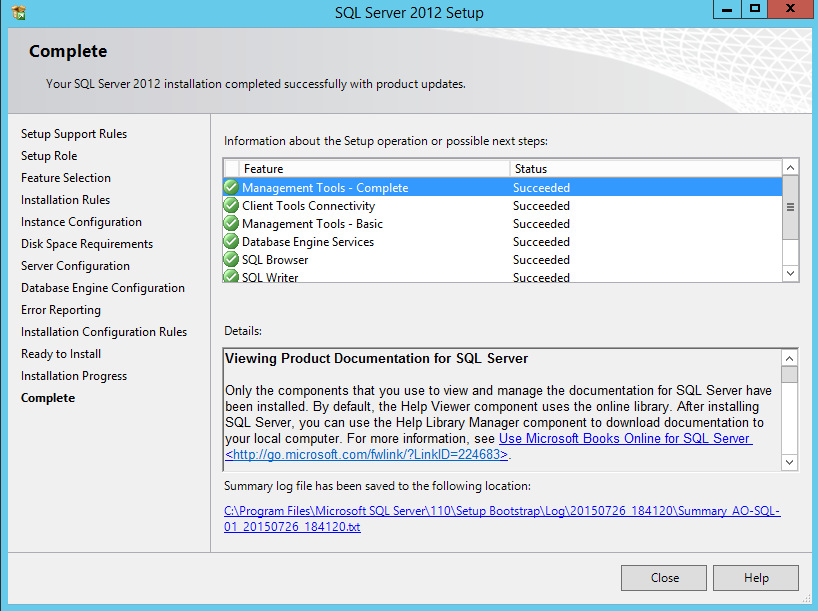
After some time… SQL Server 2012 Setup will complete all activities and SQL Server will be ready to use.
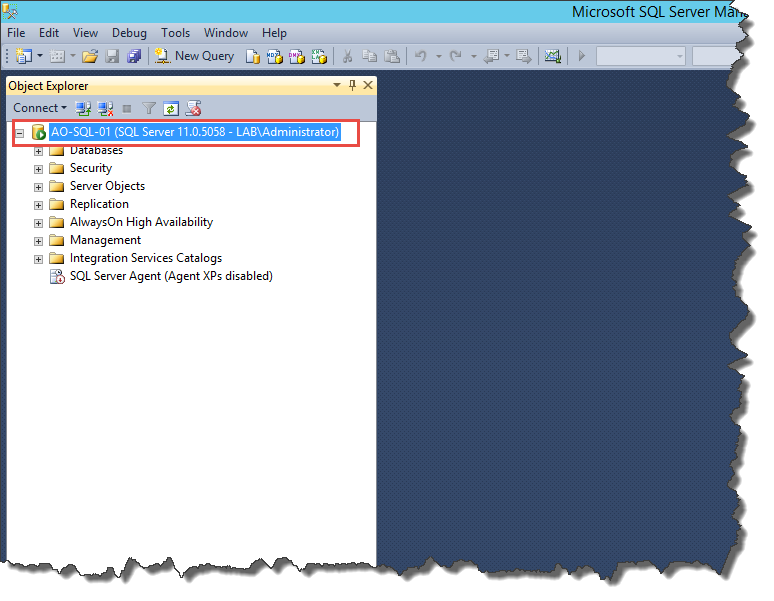
TO check is SQL is fully operational start SQL Server Management Studio and connect to server using Windows Authentication.
You should see result as below.
Demo database preparation
For demo/test purposes I will use AdventureWorks database which is available for free on CodePlex – https://sql2012kitdb.codeplex.com/
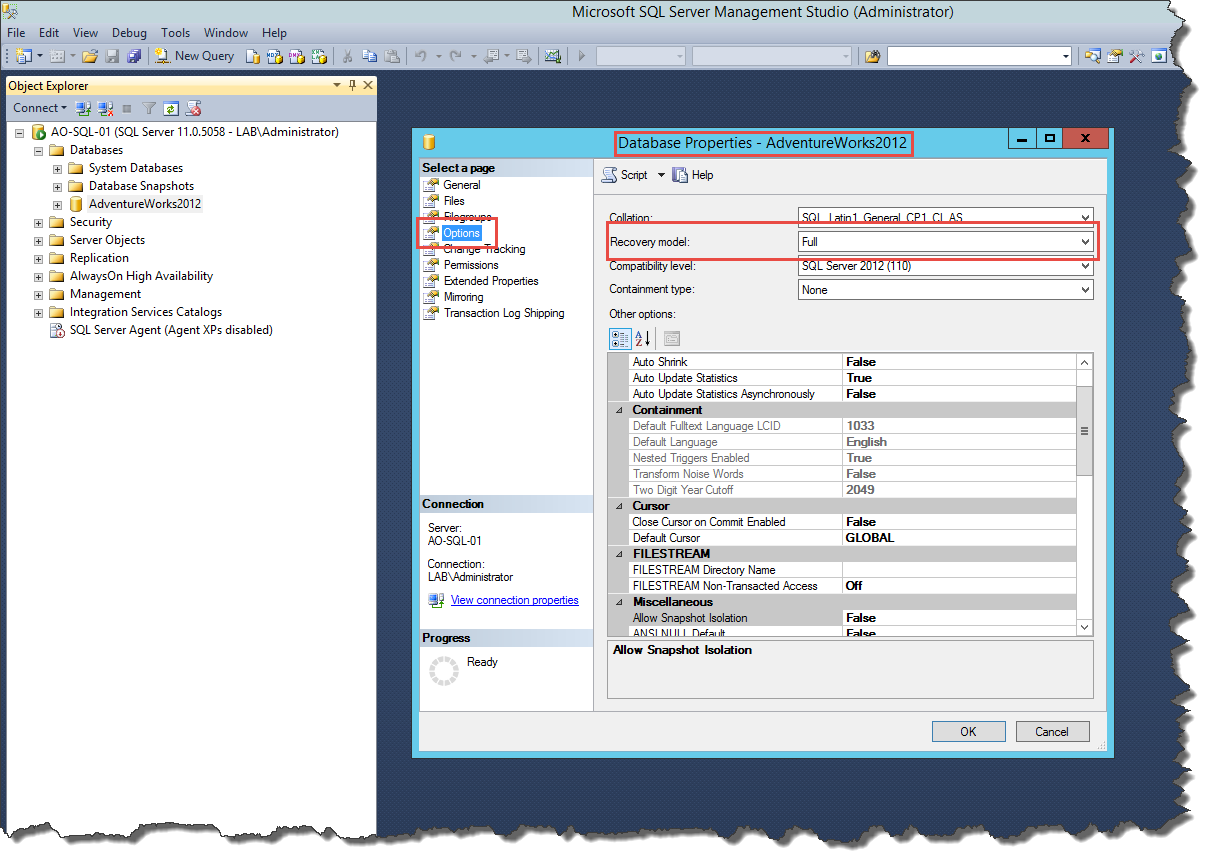
Once you download and connect AdventureWorks database to SQL Server make sure that Recovery model is set to Full.
That is required by AlwaysOn functionality.
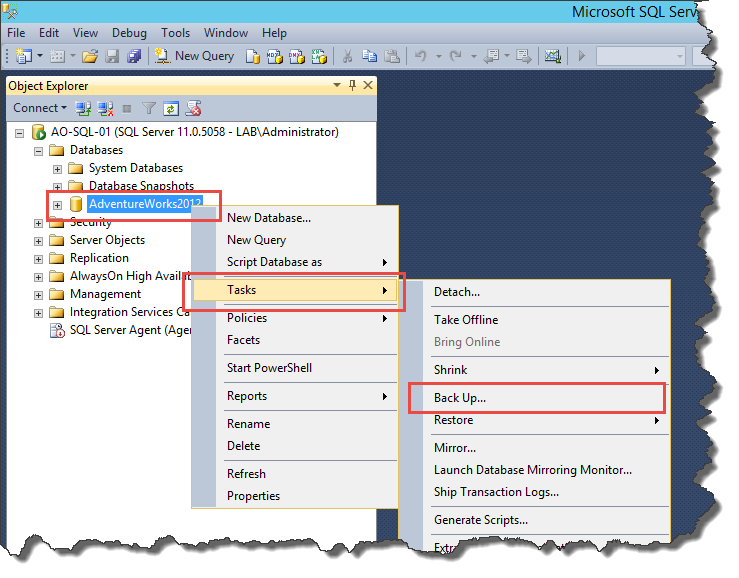
Then make full backup of AdventureWorks database. That will be initial backup which will be used by AlwaysOn to restore database on secondary replica of database.

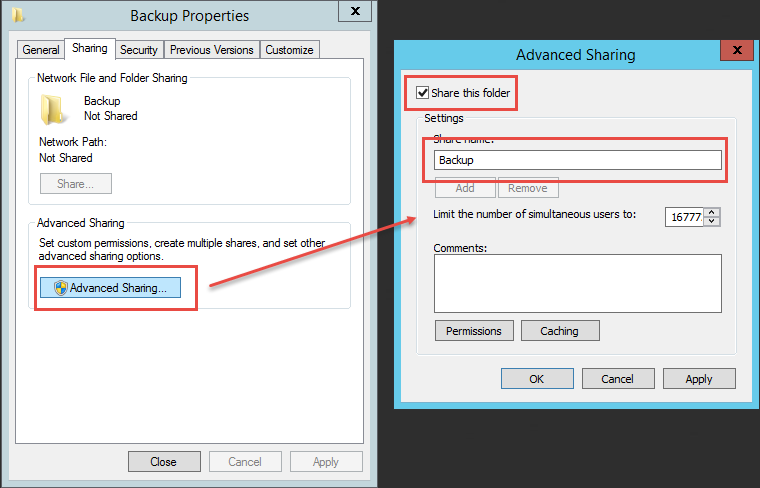
Once backup is completed located backup file on disk…

… and make sure that folder with backup will be shared, so other servers can access it in order to restore backup during AlwaysOn replica initialization.
Enable Availability Groups on SQL Server
Now we have Windows Server and SQL Server prepared for AlwaysOn. One last thing before AlwaysOn can be configured is to enable this functionality on SQL Server.
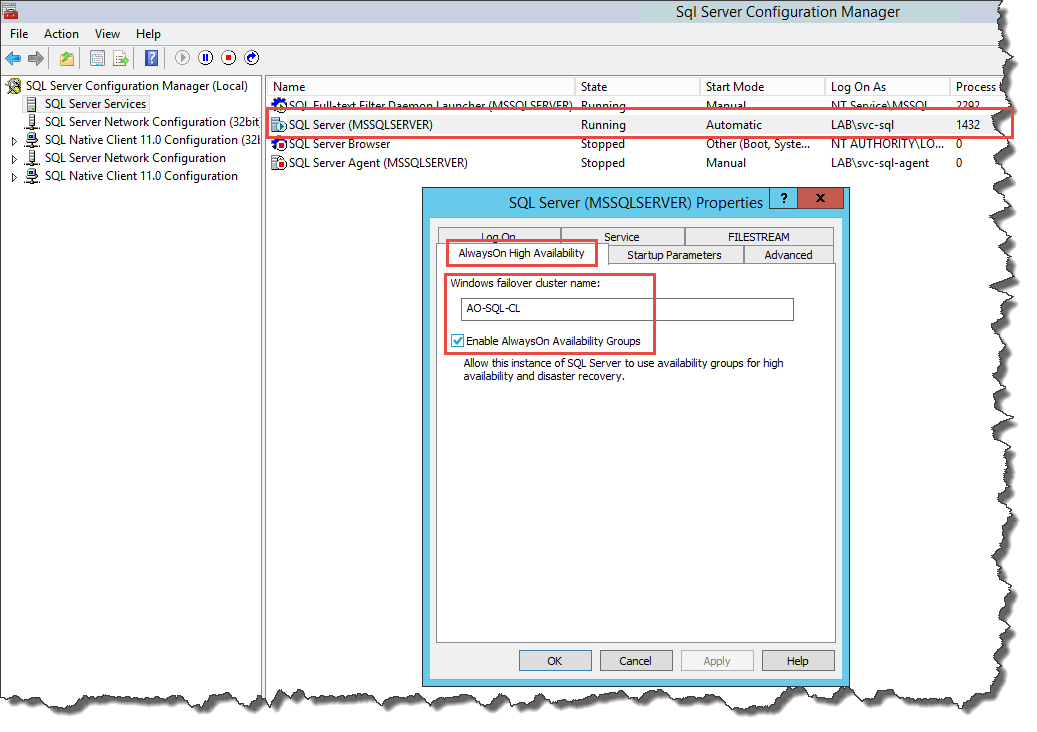
In order to do that start SQL Server Configuration Manager. Locate SQL Server Services container. Right-click on SQL Server (MSSQLSERVER) and from context menu choose Properties.
Go to AlwaysOn High Availability tab and check Enable AlwaysOn Availability Groups checkbox.
Once enabled you need to restart SQL Server service in order for a change to take effect.
Creating AlwaysOn Availability Group
Now we ready to create AlwaysOn Availability Group.
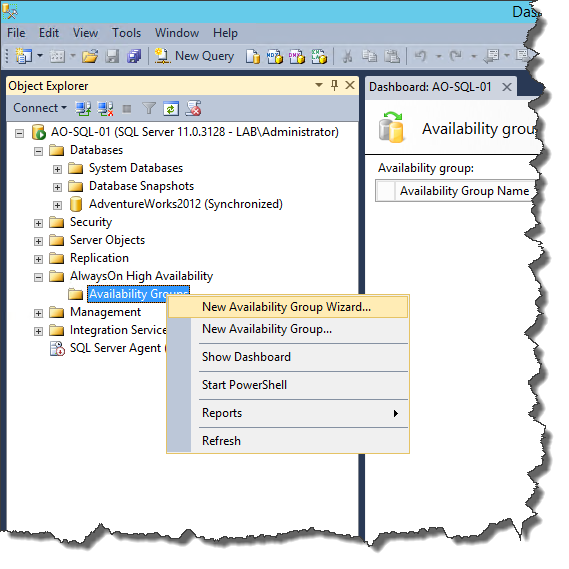
In order to do that start SQL Server Management Studio on server which will be Primary (in my case AO-SQL-01).
Then locate container AlwaysOn High Availability, right-click on it and choose New Availability Group Wizard…
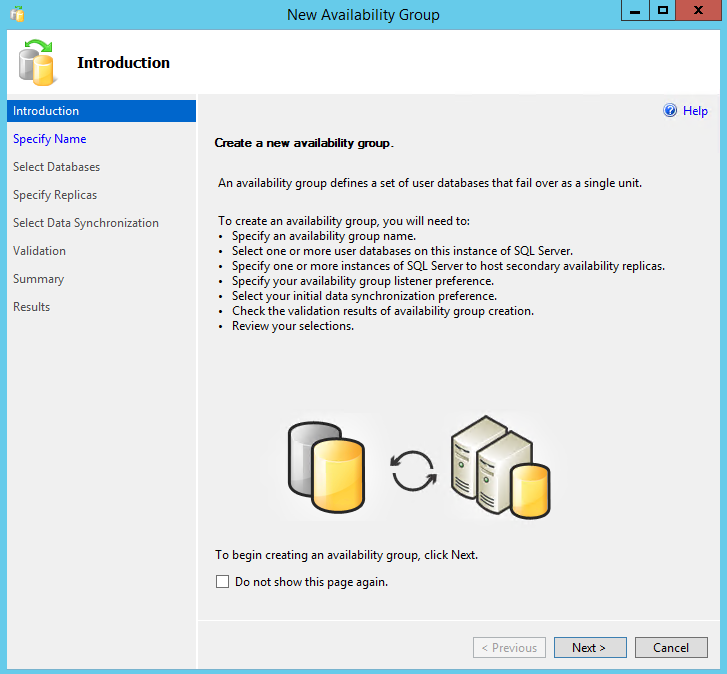
New Availability Group wizard will start and on the first screen we can see list of all sections which will appear during Availability Group setup process.
Click Next to continue…
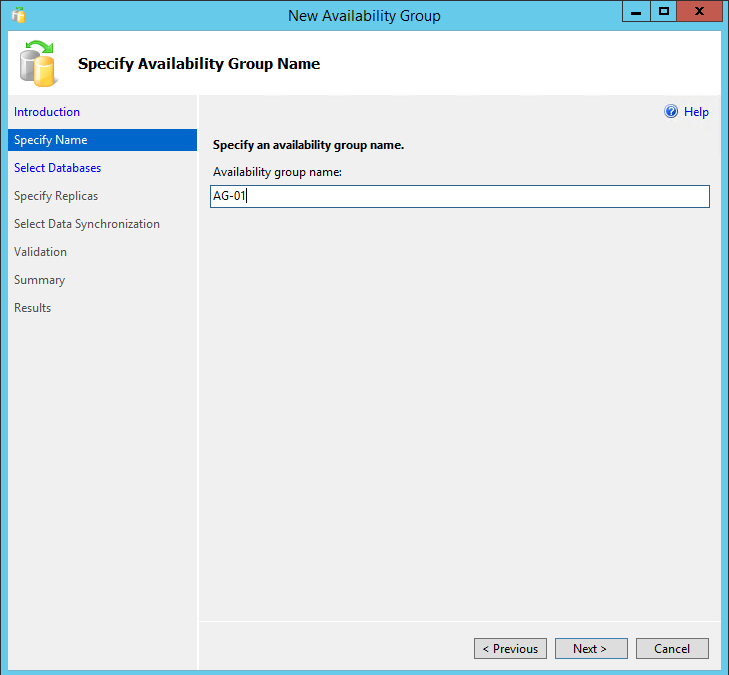
First we have to specify Availability group name. In example I named it AG-01. Then click Next…
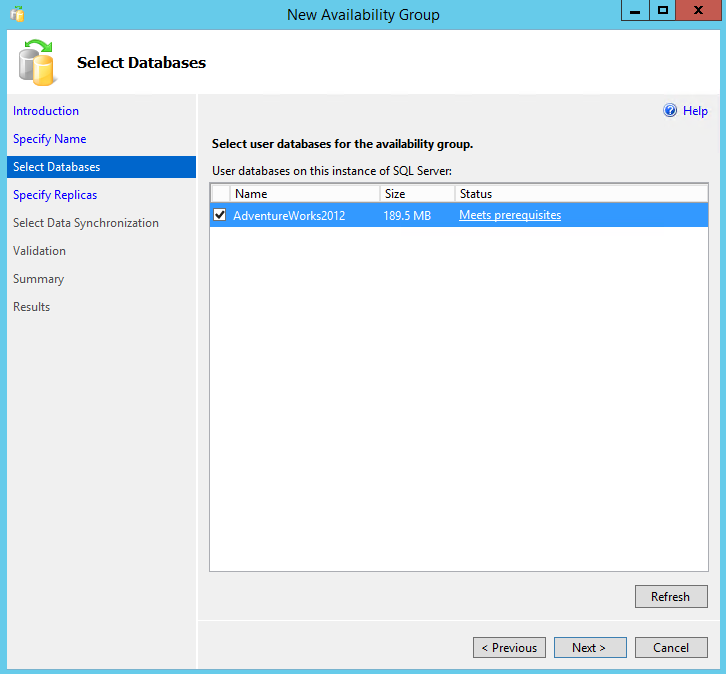
Next screen allows to specify databases which we want to include in Availability Group. I have only one database in the example which meets prerequisites to be part of AlwaysOn Availability Group, so I select that database (AdventureWorks2012).
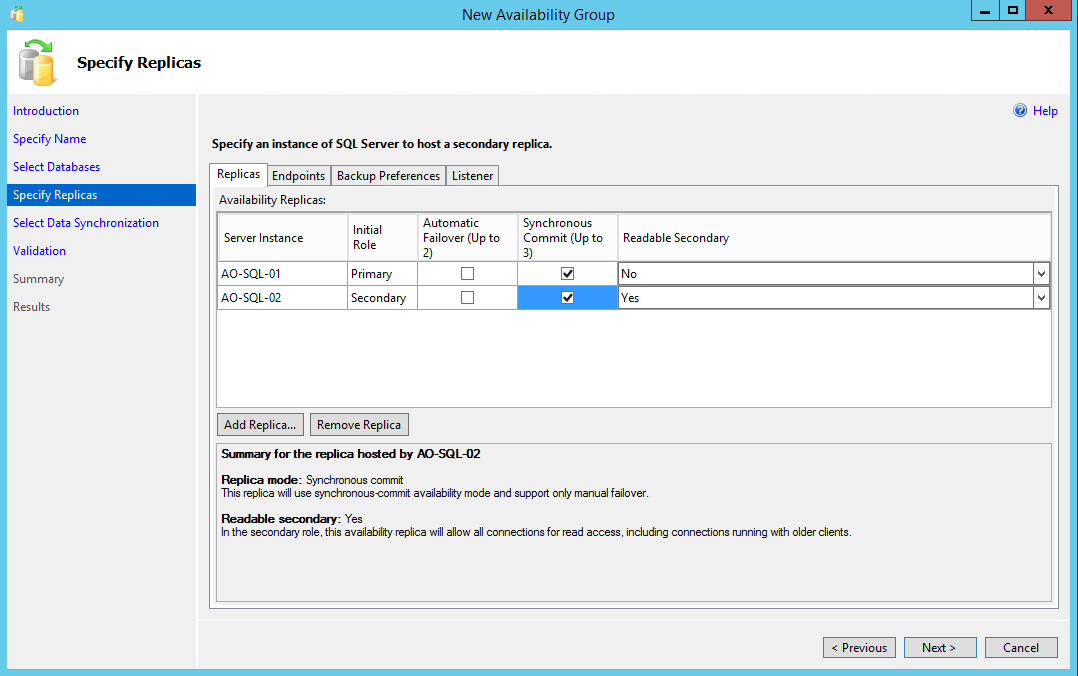
Once database is selected we can define where replicas will be stored and define parameters of all replicas.
First tab on Specify Replicas allows to define all Replicas (servers) of databases.
I add AO-SQL-02 to Availability Replicas and define it as Readable Secondary. That allows to use secondary replica as a source of data for reporting.
Also, I check Synchronous Commit on both replicas. That allows me to be sure that once Primary will have any updates all replicas will be updated “same time”.
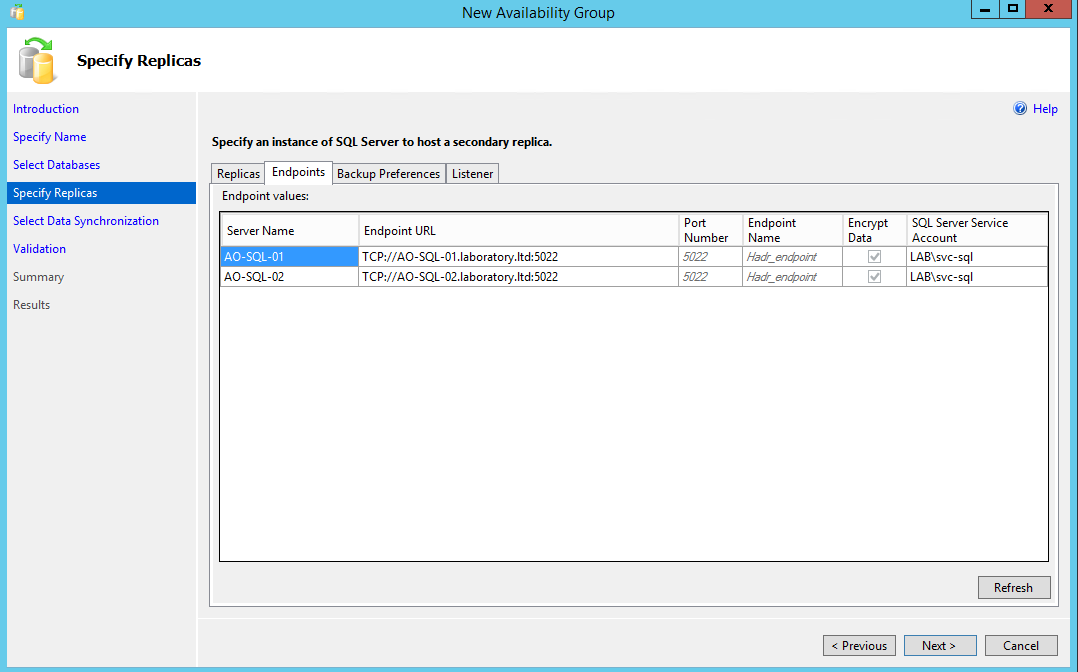
Second tab on Specify Replicas allows to define Endpoints parameters for AlwaysOn Availability Group communication.
Here you can also setup the account which will be used when communicating between replica-servers within Availability Group.
I use my SQL Server Service account LAB\svc-sql for that purpose.
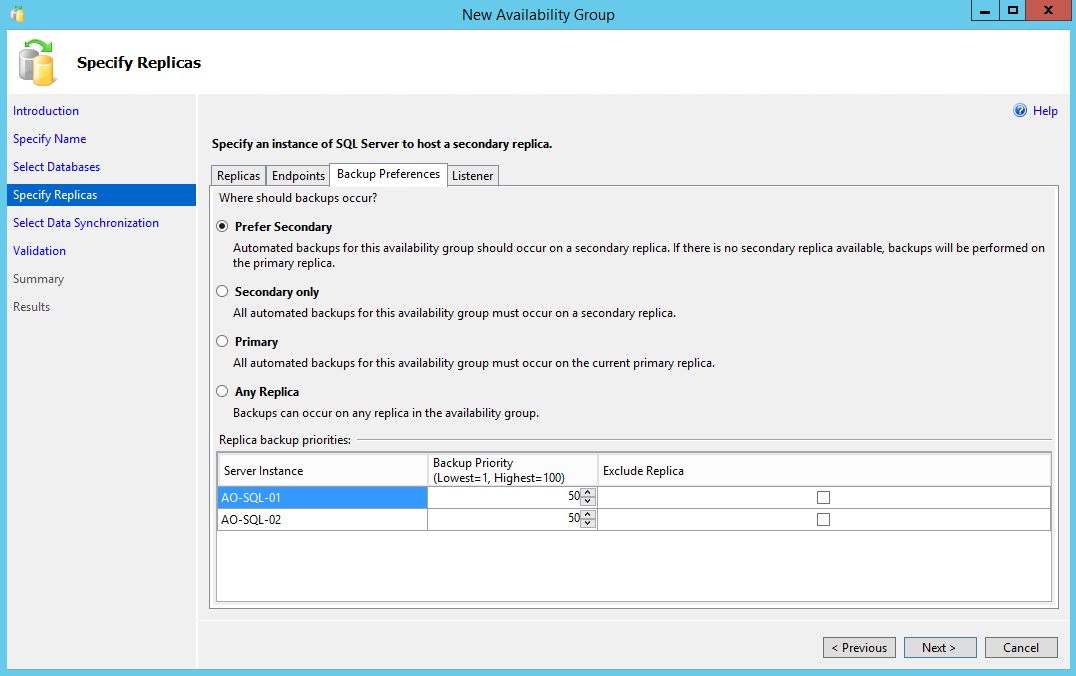
Third tab, Backup Preferences, defines where backups for particular Availability Group should occur.
Default option is Prefer Secondary and that is the option I choose as well.
Fourth tab, Listener, defines client connection point and will be added as Resource to Failover Cluster.
Listener allows clients to connect to Availability Group databases transparent way when failover of databases will occur.
Parameters I choose for Listener in the example:
- Listener DNS name – AO-AQL-AG-01 – that name will be registered in DNS, so clients can use it when connecting to SQL Server
- Port – 2433 – that is port which clients will use when connecting to Listener
- Network mode – Static – that requires IP address to be assigned to Listener, but allows to have one IP address for particular Listener
Once all parameters set click Next to continue.

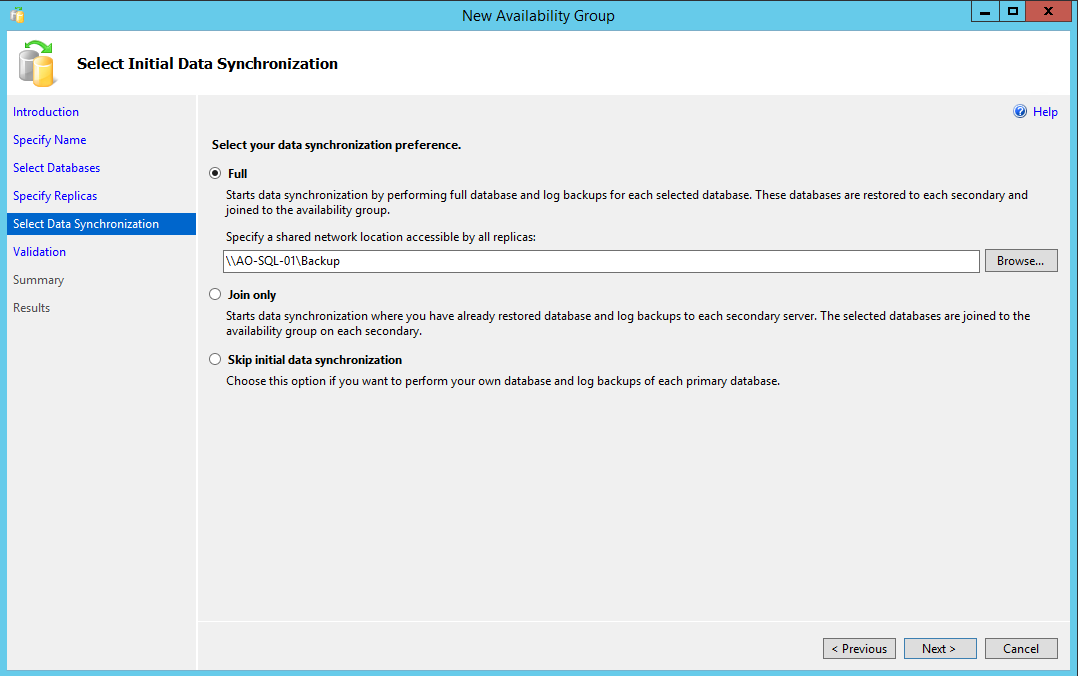
On Select Data Synchronization screen we can choose data synchronization preference.
I go with Full, which means that during setup full synchronization of database will occur.
In order for synchronization to happen you need to point New Availability Group wizard to folder with full backup of database.
Share I created few steps earlier is \\AO-SQL-01\Backup.
Then click Next to proceed…
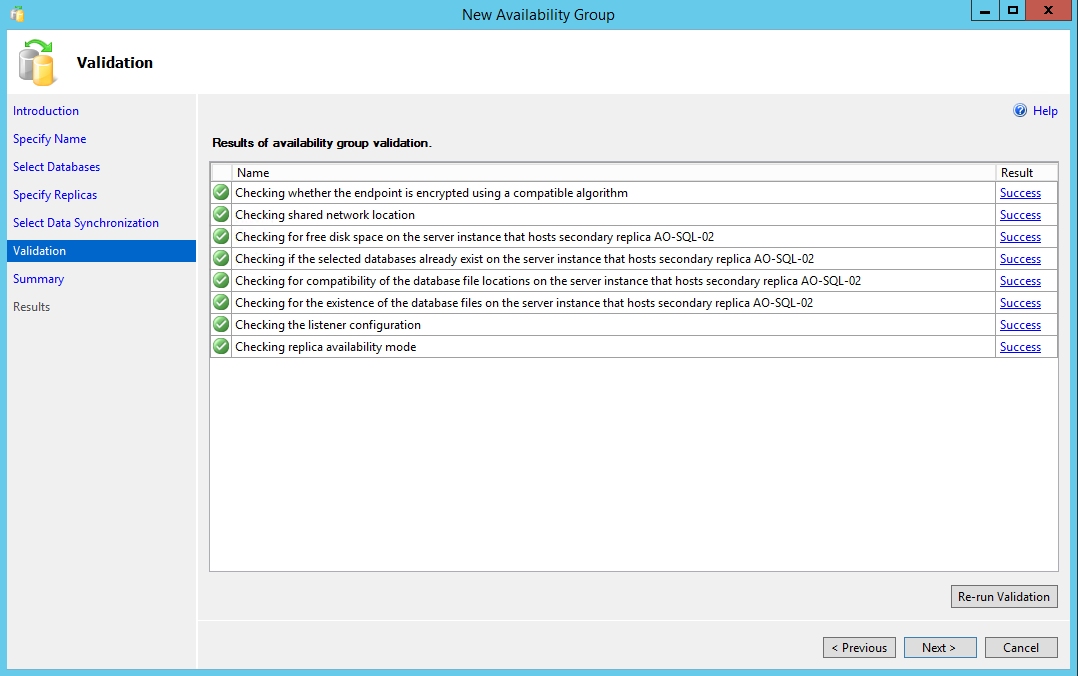
Now some validation check are done by New Availability Group wizard…
…once completed with Success click Next to continue…
Summary screen shows all choices made so far… once all parameters confirmed click Finish to create Availability Group.

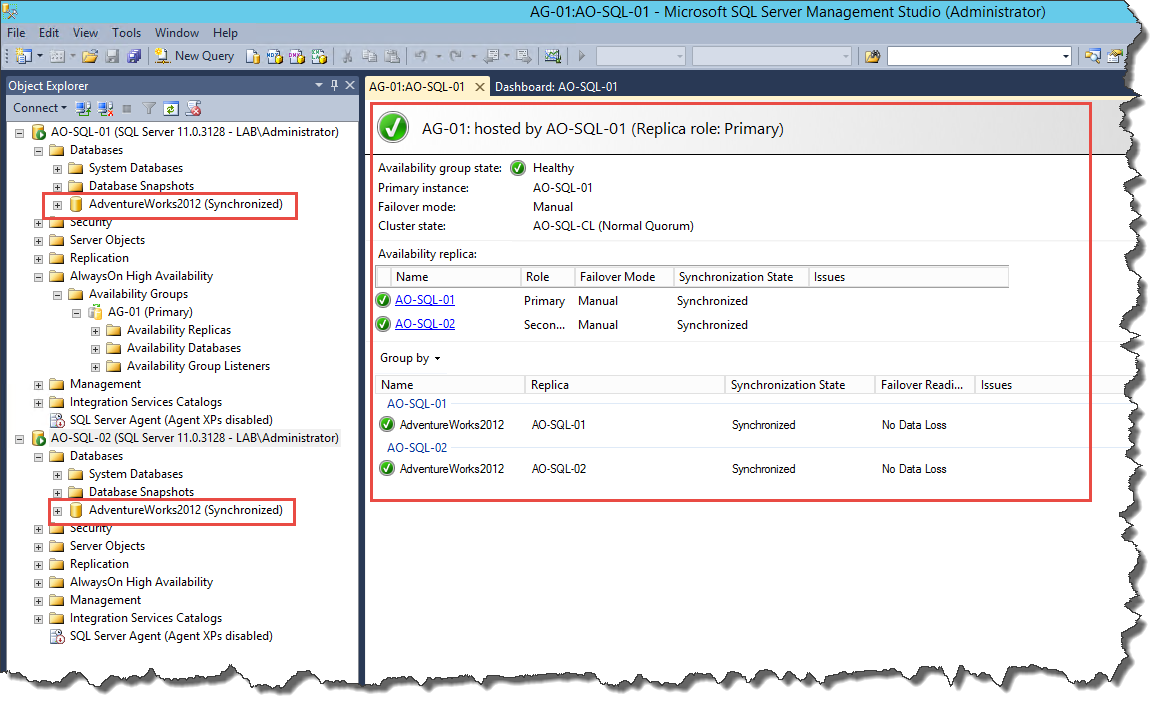
New Availability Group wizard will work for some time and after a while Availability Group will be setup as shown on screen below.

In SQL Server Management Studio you can verify results of AlwaysOn Availability Group and see status of all replicas…

…and see Availability Group information on Dashboard.
Now you can enjoy SQL Server 2012 with AlwaysOn Availability Groups 🙂
Hello, first of all great tutorial.
But do you have any comments on adding a separate network for the cluster data? Is this a recommendation/best practice?
Any tutorials on that?
regards,
Dietrich
Hi Dietrich,
For AlwaysOn purposes there is no need for additional network.
I guess you are referring to traditional cluster setup with separate network for heartbeat?
That is not needed for AlwaysOn.
It if required for Failover Cluster with quorum and for that purpose you can add separate network adapter in server.
If you want to have it redundant you can use dual-port network adapter for heartbeat, team both ports, connect each to separate switch and assign separate subnet to those interfaces.
Also, disable DNS registration on heartbeat interfaces (if these are separate NICs dedicated to heartbeat only), so there will be no attempts to access cluster nodes via wrong IPs.
That’s I think all from general ideas.
If you have more specific question, please let me know and I can help you with configuration.
skufel
We have this in production working fine.
The only problem we have is to copy from, let’s use these names, \\AO-SQL-AG-01\g$\backup to \\Some-new-server\D$\DBcopies. This must be executed from third ( Application ) server which is using ‘AO-SQL-AG-01 as HA instance. User can access remote DB folders when going directly to cluster members but has no AD privileges to access it using VIP.
So the it looks like VBS or Power Shell script that resolved Primary server name out of HA name and executing copy is the only solution.
Any other ideas or how that VBS snippet should look like?
Thanks,
Drago Kurkic
Hi, great tutorial.
Can you tell in witch program did you use to crop the screen shots in that way?
Hi, sure I can… I use TechSmith SnagIT.