Often using VMware Workstation platform we need to quickly create new virtual machine. reasons for that might be different. For example additional machine for our Lab environment or just quick test without affecting other machines we have setup in our virtual environment.
Installing whole operating system with all applications we used to have in our setup might be time consuming process. That is why it is worth to consider creating and using templates to be able quickly generate virtual machines we need.
To prepare templates for our VMware Workstations we need to:
- Install Windows 7 and prepare for tempalting
- Prepare Windows 7 to be used as a template
- Prepare virtual machine to act as a template
- Create new virtual machine from template
Let’s see all details behind all phases of preparation for templating on VMware Workstation.

Install Windows 7 and prepare for tempalting
First we have to create virtual machine and install operating system. For that purpose I’ve created virtualm machine with following parameters:
- Name: Template – Windows 7 x64
- Memory: 1GB
- HDD: 60GB
We will create template for virtual machines with Windows 7 64-bit. For that we need installation ISO image or DVD with Windows 7.
Install operating system on virtual machine. After that install all recent patches from Microsoft Update, VMware Tools and all applications you want to have in all virtual machines created from template. I guess everyone has own set of applications which likes to have ready to use on any computer. Also, I’ve created only one system partition on 60GB hard disk. If more hard disk will be required on particular virtual machine cloned from template we can always expand or add more space when exact purpose of the virtual machine will be identified.
Once Windows 7 is fully installed we can proceed with preparing out virtual machine to be a template for all future instances of Windows 7 64-bit on our VMware Workstation.
Prepare Windows 7 to be used as a template
To use prepared Windows 7 instance as a template all unique information has to be removed and operating system has to be prepared to generate new unique identifier for every new clone. To complete that step standard built-in tool – Sysprep – can be used to prepare operating system. Following steps will demonstrate how to prepare our installation of Windows 7 for templating.
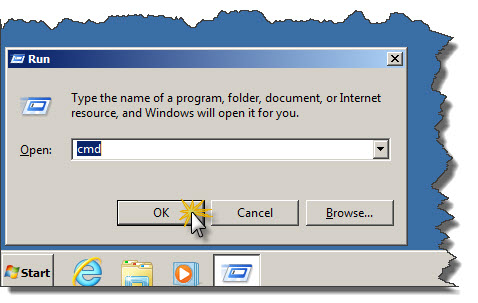
1. First let’s start Command Prompt. In order to do that click Start then Run. Type cmd and click OK button.
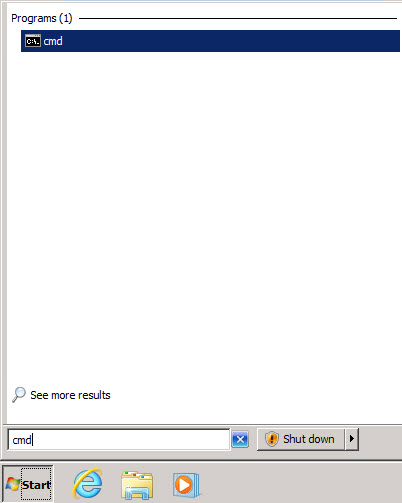
2. If you don’t have Run option in Start menu then just type cmd in Search programs and files and press Enter.
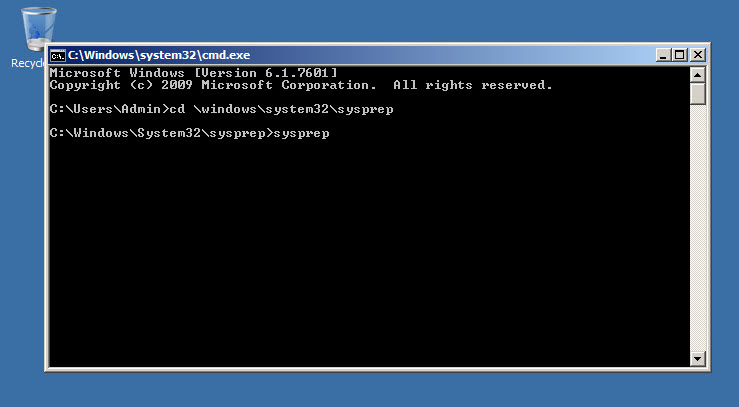
3. Once Command Prompt window will appear type cd \windows\system32\sysprep and press Enter. Once you will be in Sysprep folder simply type sysprep and press Enter.
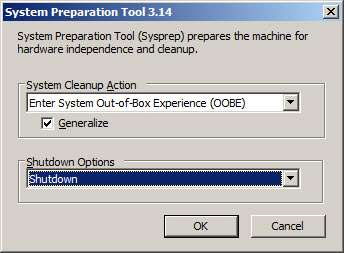
4. After a while you will see System Preparation Tool on the screen. Make sure that you will choose Enter System Out-of-Box Experience (OOBE) and Generalize checkbox is checked in System Cleanup Action section. In Shutdown Options choose Shutdown. Once all options set as described click OK.
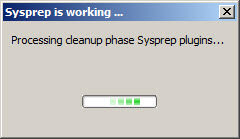
5. Sysprep will be working for a while as shown on the screen below and all unique operating system information will be removed. Once it’s done Windows will shutdown.
Now we are ready to proceed with indicating that out Windows 7 virtual machine is a template we want to use on VMware Workstation platform.
Prepare virtual machine to act as a template
Once operating system and all additional components are fully installed and Sysprep prepared Windows 7 we can now prepare virtual machine to serve as template for new machine created on VMware Workstation.
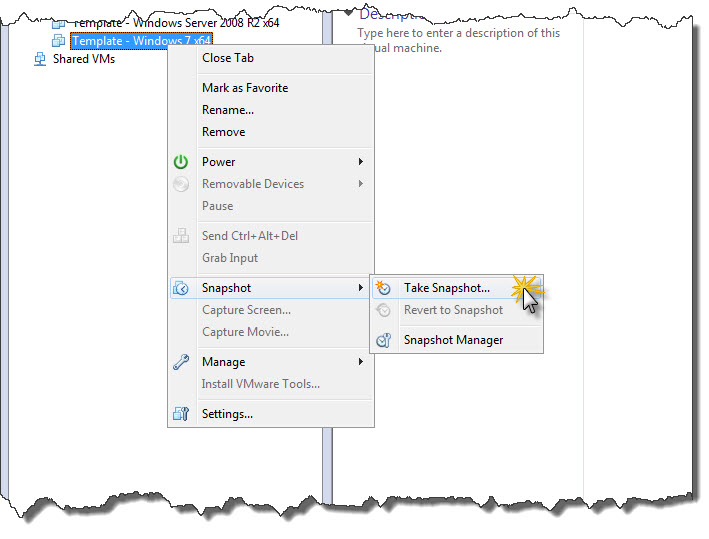
1. First we nedd to create snapshot of the virtual machine which will be used as a template. In order to do that righ-click on Template – Windows 7 x64 virtual machine. From context menu chose Snapshot and then Take Snapshot…
Screen below illustrates how ot trigger taking snapshot action.
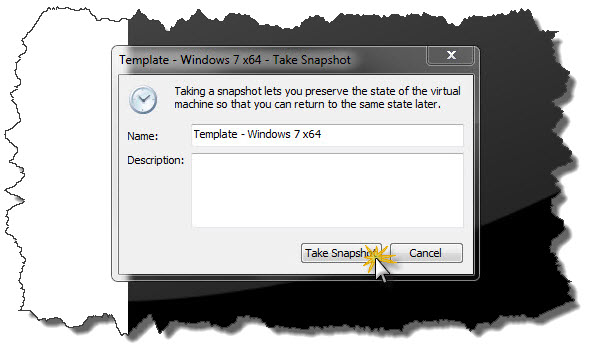
2. Next what will appear on the screen will be the dialog window in which you can name snapshot of the virtual machine. You can name snapshot same as virtual machine – Template – Windows 7 x64. That name will be used later on when creating new virtual machines from template.
Screen below demonstrates dialog windows in which you can assign name to snapshot.
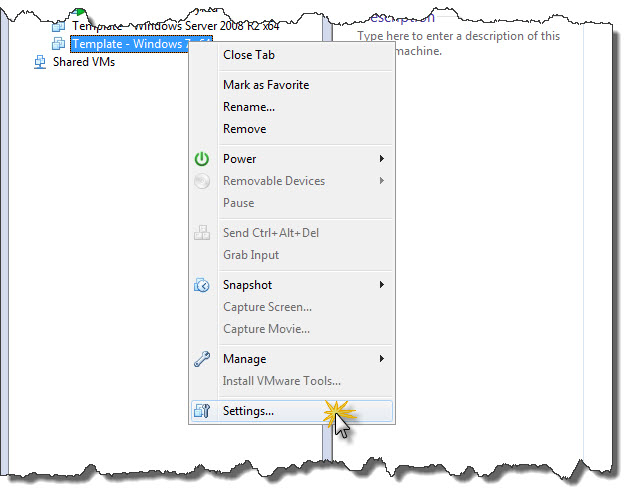
3. Once snapshot of the template machine is taken we need to inform VMware Workstation to use this particular virtual machine as template available for cloning in future. This can be done in virtual machine Settings. In order to get to apropriate dialog window right-click on Template – Windows 7 x64 virtual machine and then click Settings… in context menu.
Screen below shows how to enter virtual machine settings dialog window.
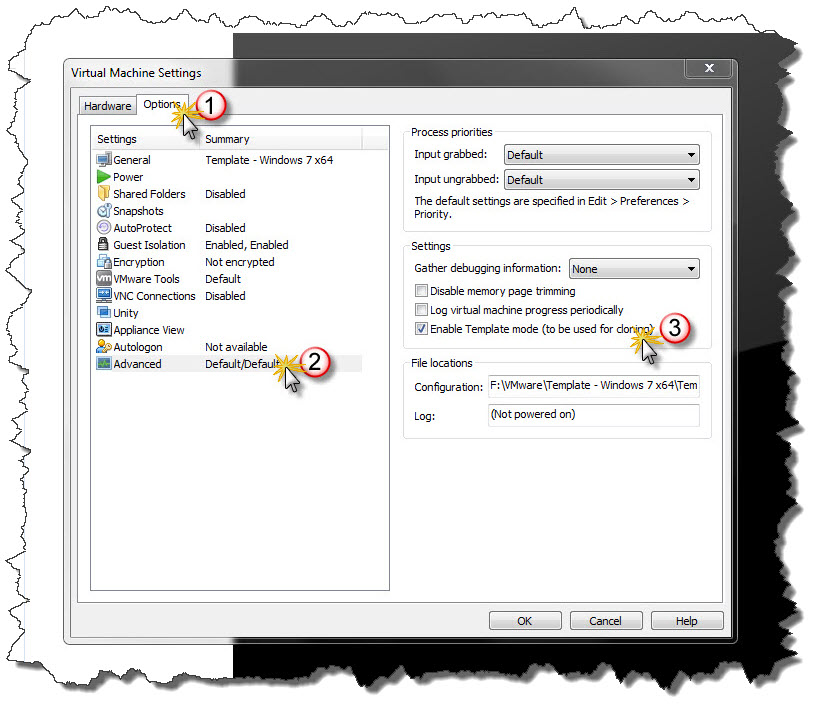
4. You will see virtual machine settings. Next what you have to do is click Options tab. Then on the list of different settings locate Advanced and click it. In right part of dialog window you will see list of options in Advanced settings. Locate Enable Template mode (to be used for cloning) and check the checkbox next to that option. After that click OK and you ready to create new virtual machines from template.
Screen below shows how to indicate to VMware Workstation that virtual machine should be used as a template.
Create new virtual machine from template
Now, after all preparation, we are ready to create new virtual machine using template we created in previous steps. In order to do that follow steps below.
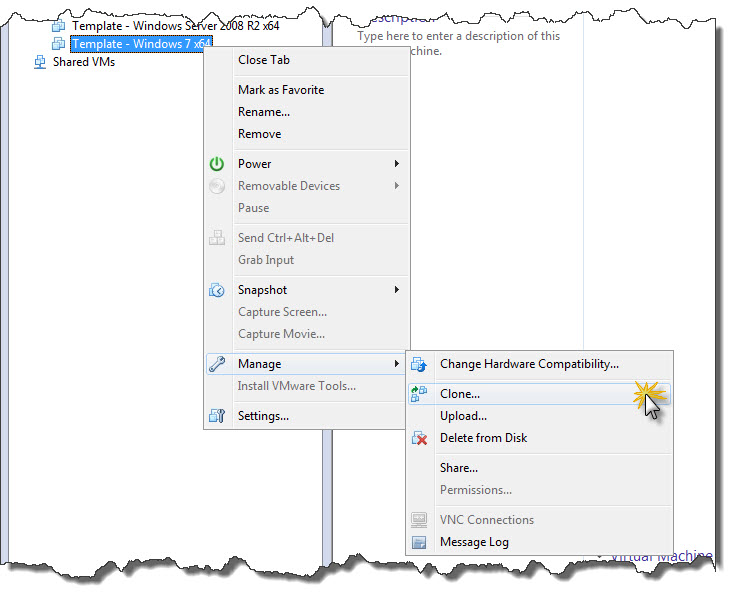
1. Right click on Template – Windows 7 x64 virtual machine and from the context manu choose Manage and then Clone… (as shown on screen below).
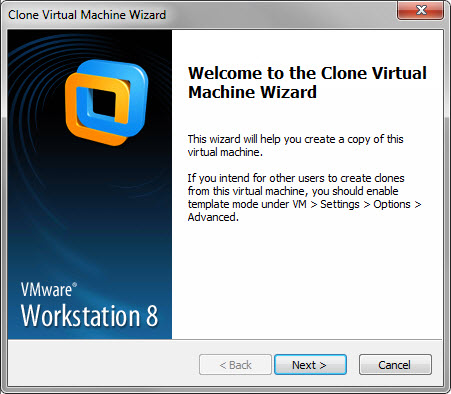
2. Next thing you will see will be Clone Virtual Machine Wizard welcome screen. This screen is only for informational purposes and no parameters to be set here. Click Next to proceed ot next step.
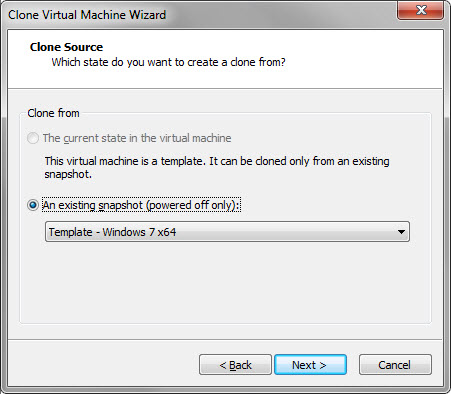
3. Following screen of the wizard allows you to chose Clone Source snapshot you want to use as template for new virtual machine. As we will be using Template – Windows 7 x64 machine as a template make sure that An existing snapshot (powered off only) option is selected and Template – Windows 7 x64 virtual machine is chosen from the list (as shown on screenshot below).
4. On next screen – Clone Type – allows to chose one of two methods of creating clone:
- Create a linked clone – new virtual machine will be created with minimal disk space usage. In order to work correctly machine created from template will have to have access to template virtual machine. That makes machine created from template dependant on template virtual machine. If template will be moved or deleted it will affect machines created from template.
- Create a full clone – new virtual machine will be exact clone of template virtual machine. Also, machine created from tempalte will not need to access template files in future, so new virtual machine created from template will be completely independent.
NOTE: If you creating home lab environment on VMware Workstation then you can user Create a linked clone option as that will allow to reduce disk space usage.
Screen below illustrates Clone Type stage of Clone Virtual Machine Wizard.
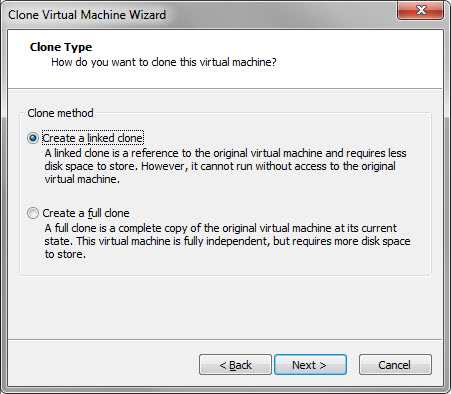
5. Next screen – Name of the New Virtual Machine – allows to assign name of the new virtual machine which will be created and identify location on the hard disk where new machine will be stored once clone from the image will be created.
Screen below illustrates Name of the New Virtual Machine screen of the Clone Virtual Machine Wizard.
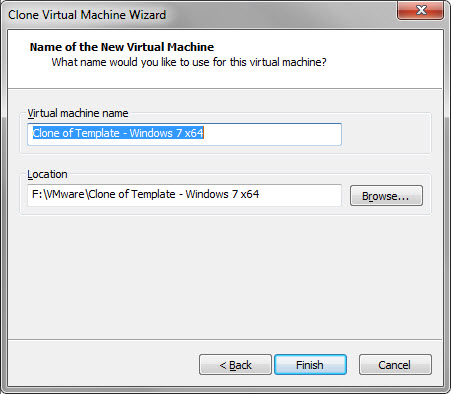
6. Last screen – Cloning Virtual Machine – shows progress of the cloning process. Once finished new virtual machine will be created from template and will be ready to use.
Screen below illustrates Cloning Virtual Machine stage of Clone Virtual Machine Wizard.
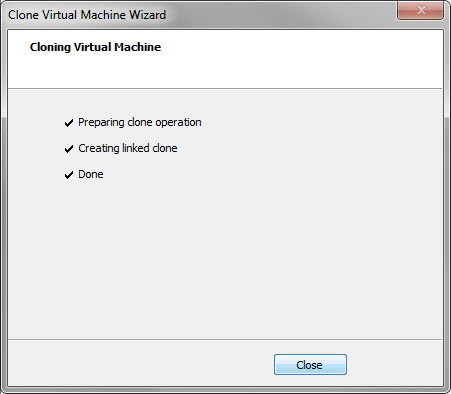
7. Once all steps are completed and clone is created from template virtual machine you can enjoy new system. New virtual machine will show on th elist of the virtual machine in VMware Workstation 8 management console and is ready to be powered on.


Good One! It is very easy and precise.
while creating a full clone, I can’ do anything else in VMware workstation. It’s like the cloning process takes over, is that normal.
Yes, full clone makes exact copy of template virtual hard drive, so it might consume all resources. That of course depends how powerful machine you have and how well disk subsystem is performing.
Thanks Szymon, this also worked the same for me in VMware Workstation 9.
Hi. thanks for your Great article and great guide.
really helped
best regards