RSP platform installed on Riverbed allows to run VMware virtual machines on it. THat gives very powerful environment as Riverbed might become the only appliance deployed for branch office and with WAN optimization we can also provide basic services/systems to site. That gives us huge flexibility and same time no need to deploy additional systems for site can be placed on Riverbed as virtual machines. Of course that reuires special license and also additional RAM would be recommended, so we won’t suffer performance issues (additional memory can be purchased with Riverbed appliance and RSP license, so we get ready to go environment).
But it is not enough to create VMware cityual machine on PC and upload it to Riverbed. Few more steps is involved in the process and here we will go through all steps to see how to prepare virtual machine for Riverbed on Windows 7 PC with VMware Workstation 9 installed.
First we need to download RSP/VSP Package creator from Riverbed support portal. This little application is available for free and can be downloaded by all owners of Riverbed with registered products.
So, on Riverbed support portal in Download/Steelhead section go to Riverbed Service Platform area and towards the bottom of list of all downloads you see Package Creator (see screenshot below to see how that looks on support portal).
Once we have Package Creator we can move on to VMware Workstation to create virtual machine which we want to place and run on Riverbed Steelhead appliance.
In order to do that in VMware Workstation 9 click File/New Virtual Machine…
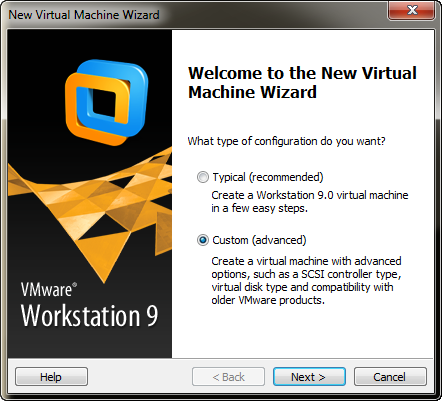
You will see New VIrtual Machine Wizard welcome screen. Click Custom and Next to proceed.
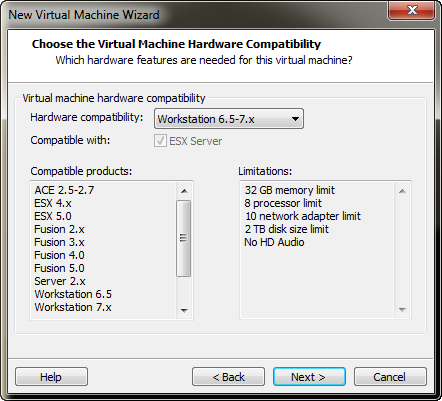
When choosing compatibility mode on screen titled Choose the Virtual Machine Hardware Compatibility click on the Hardware compatibility list and choose Workstation 6.5-7.x (RSP supports up to 6.5/7.x version of VMware virtual machines when that article was written).
Then click Next to proceed.
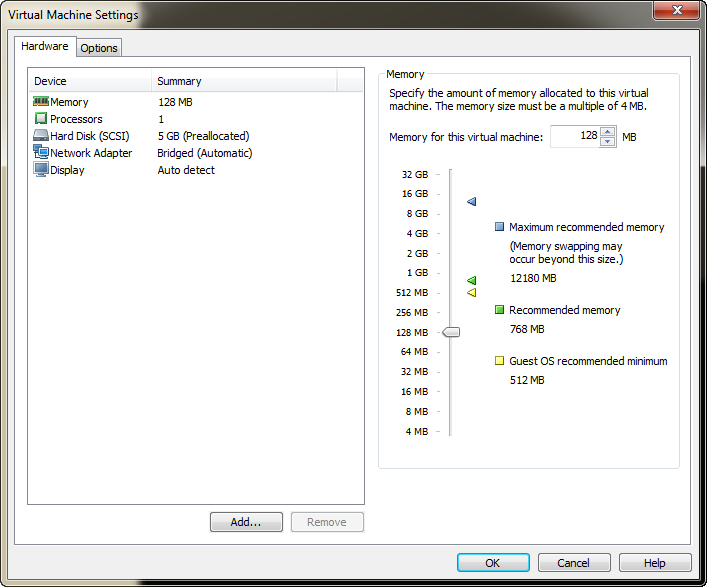
You can then create virtual machine with default options for all the rest of steps. Once VMware machine is created go to Virtual Machine Settings and make sure that everything is removed except components shown on screen below. Once all is done install operating system on virtual machine and all applications required on it.
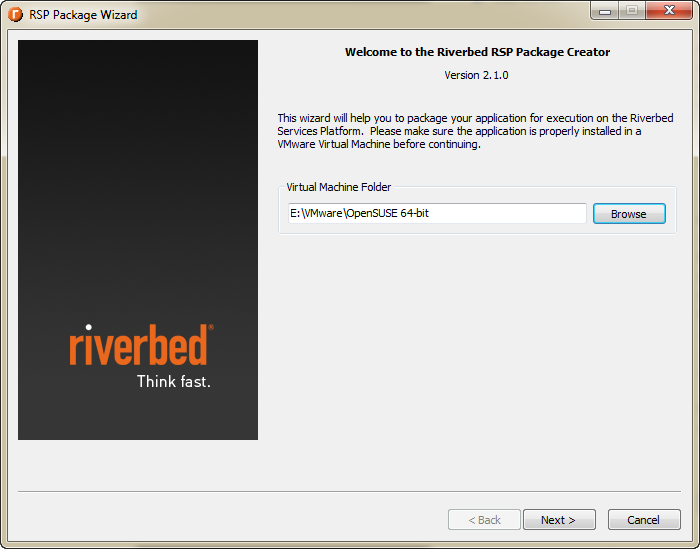
Once virtual machine is full yinstalled and ready to use shutdown guest operating system on virtual machine and start RSP Package Creator.
On first screen Package Creator will ask to idicate folder where source files for machine we want to place on Riverbed are located. Than click Next to proceed.
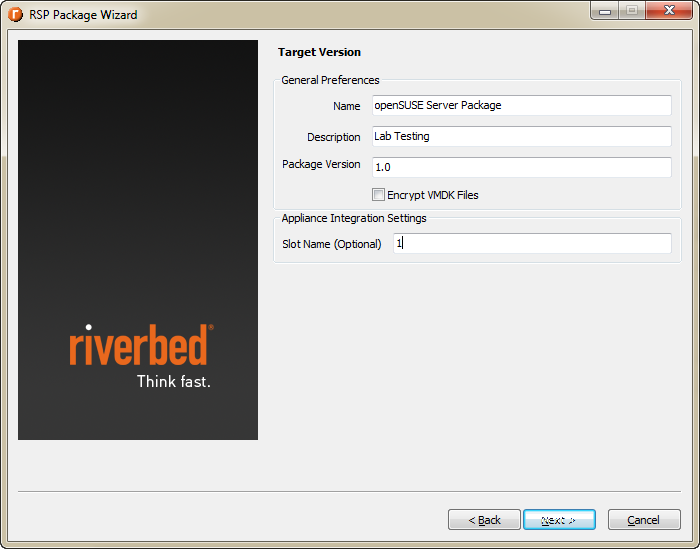
On the next screen Package Creator is asking for package name, description, version and in which slot package should be placed (this information is optional). It also gives ability to encrypt VMDK file. Once all information is provided click Next to proceed.
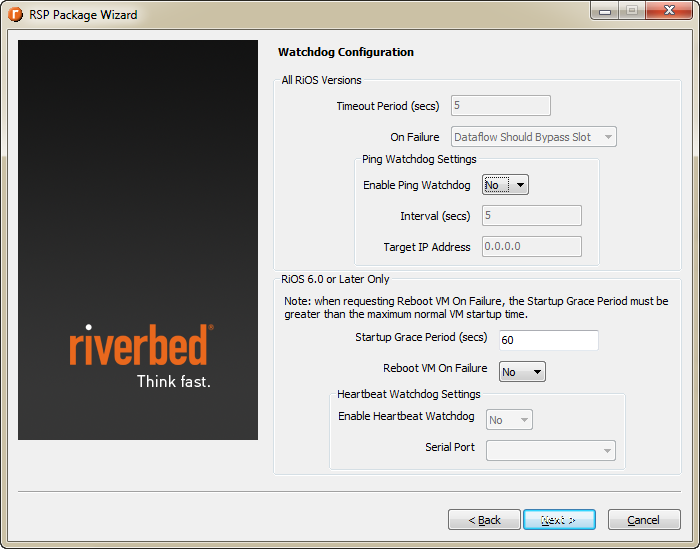
Next screen allows to setup Watchdog parameters.
As per Package Creator documentation two type of watchdog can be created:
- Ping Watchdog.You can use ping watchdog to monitor the package by simply pinging a network interface in the virtual machine. The RSP package must have a management virtual network interface (VNI) before you can configure ping monitoring.
- Heartbeat Watchdog. In RiOS v6.0, a guest application inside the virtual machine opens a virtual serial port. It then transmits a signal at regular intervals out of this port to the Steelhead appliance. This signal is called the slot heartbeat.
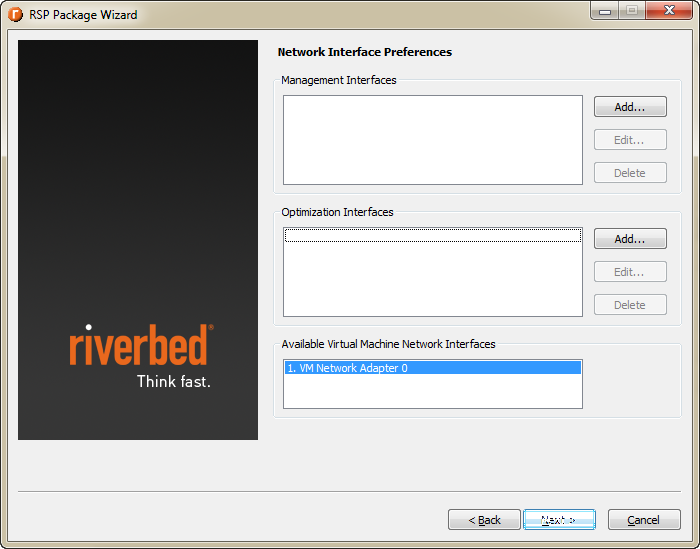
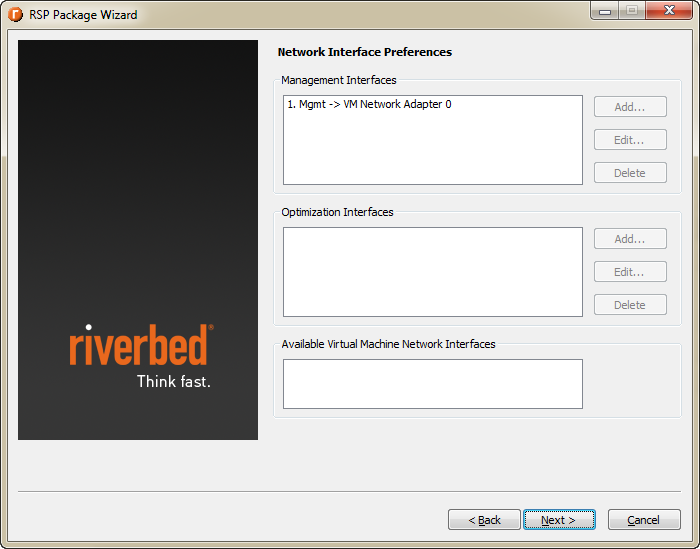
On following screen Network Interface Preferences can be set. As presented on screenshot below, Package Creator shows all network adapters available in virtual machine configuration. You can configure network interfaces as optimization or management type.
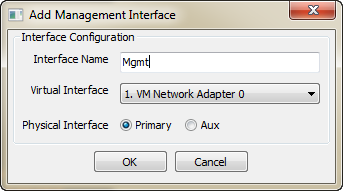
When you highlight interface available on virtual machine and click Add in Management Interfaces section you can name network interface. Once all parameters of the interface are defined click OK.
Virtual machine interface will be added to Management Intrfaces section of the RSP Package. Same time will be removed from Available Virtual Machine Network Interfaces section as each virtual interface can be assign with only one role (management or optimization).
When all interfaces are configured and assigned click Next to proceed.
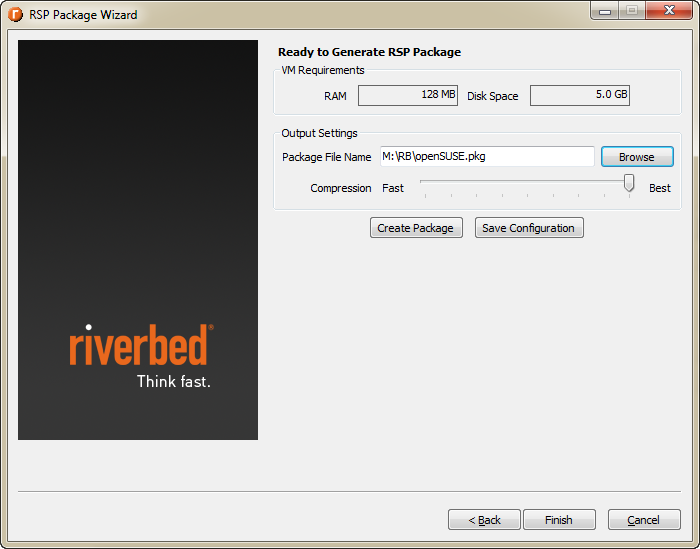
Package Creator now is ready to create package we can upload and run on Riverbed Steelhead appliance. On last screen we can see required memory and disk size (same parameters which are set in virtual machine configuration). We need to indicate location and name for package file which will be created. In addition to that we can compress image (which will increase upload speed to Steelhead appliance). Once indicated where package should be stored click Create Package button to proceed with package creation.
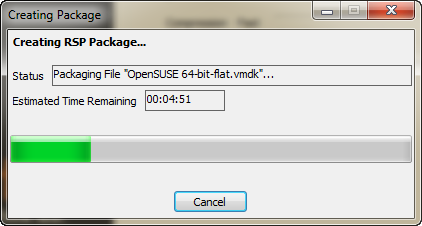
It might take few minutes to package all files (all depends how big vmdk file is).
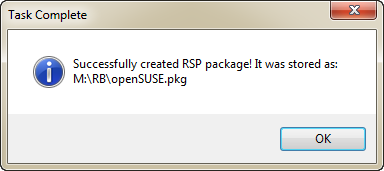
And after some time package is ready for upload to Riverbed Steelhead appliance.
We can check is package file is in place indicated to Package Creator and what is the size of the file.
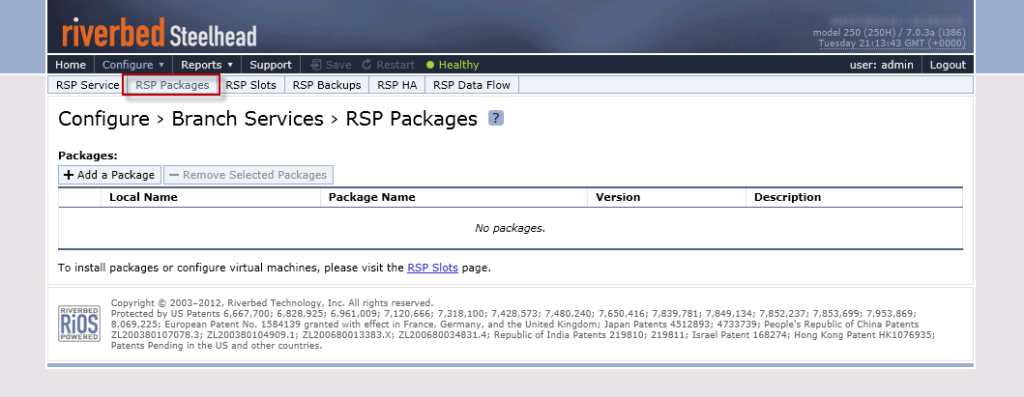
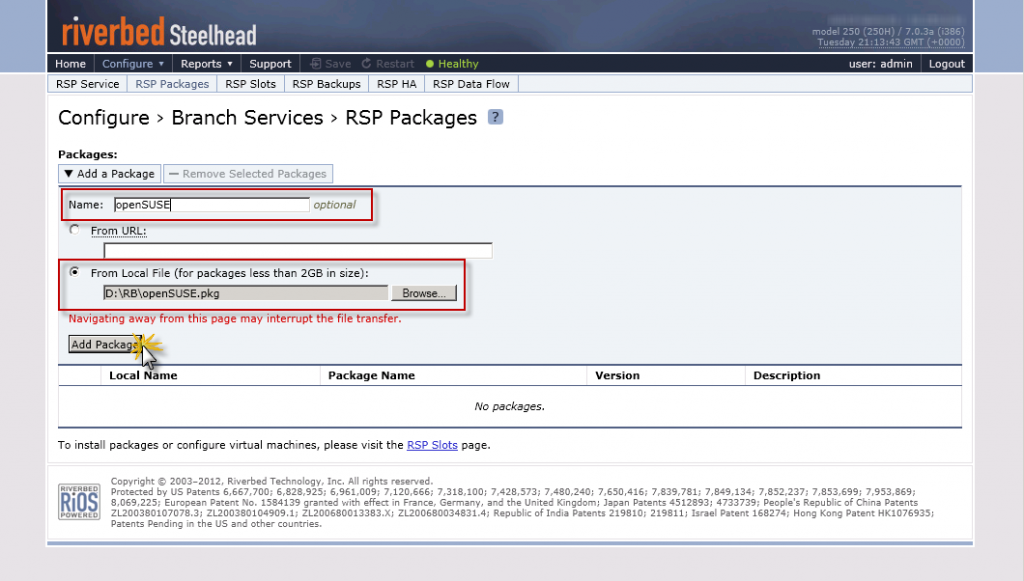
Now it’s time to upload package to Steelhead appliance. In order to do that login to Riverbed management interface and go to Configure / Branch Services / RSP Packages and then click Add a Package button.
On new package screen define name for the package and browse to packages file created by Package Creator. Once name define and package location indicated click Add Package button to start package upload.
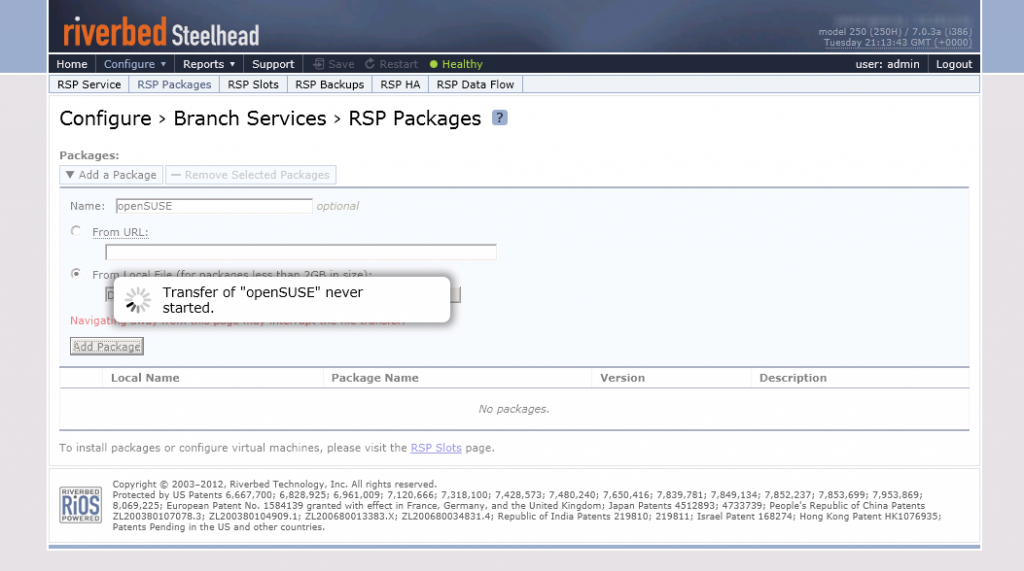
Riverbed will show information that packages transfer is started.
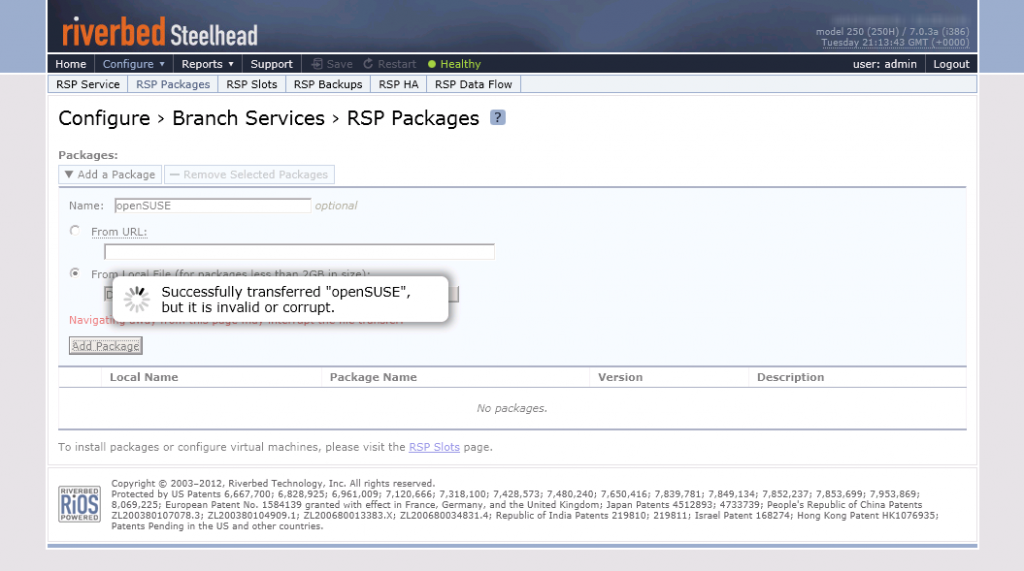
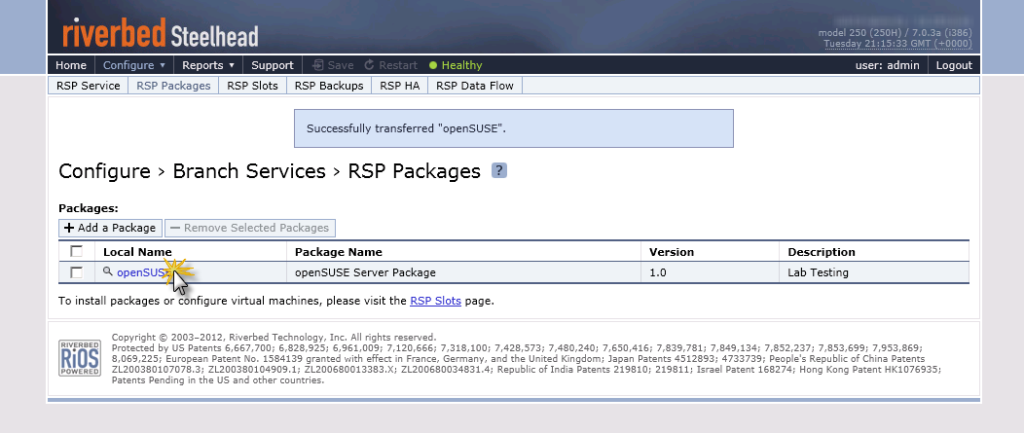
Once finished, information that packages was successfully transffered will appear on the screen.
And package will be shown on packages list.
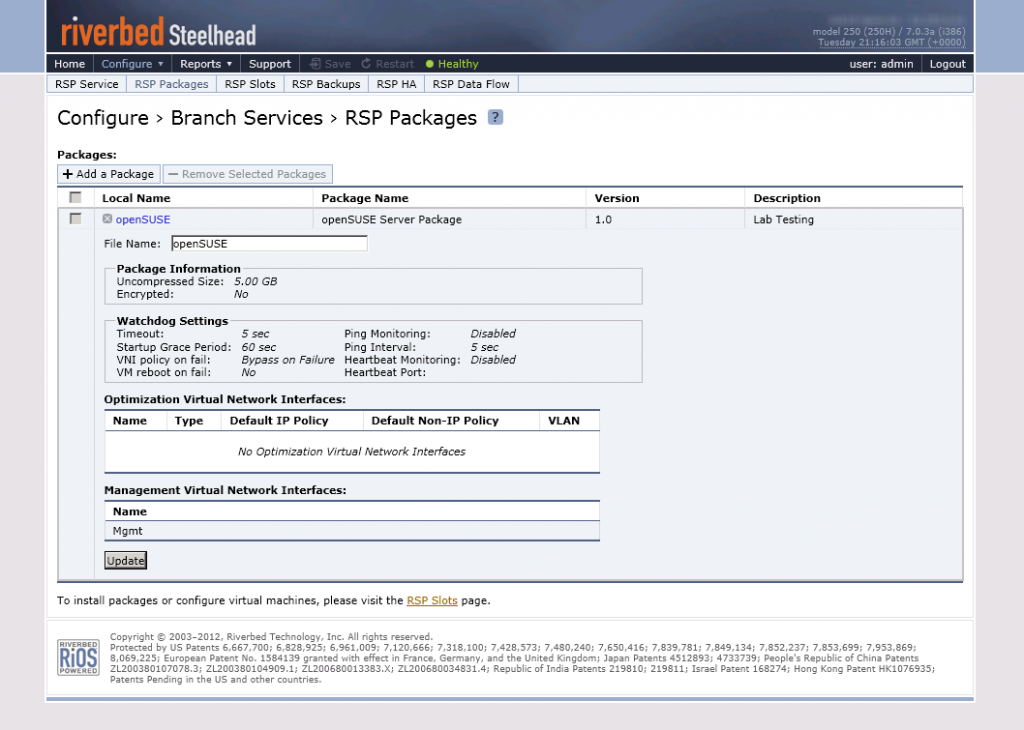
You can click on package name to see all parameters of the package.
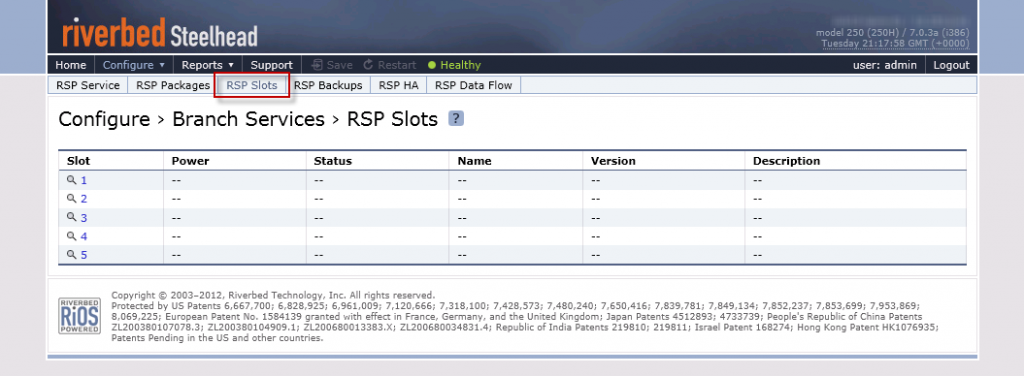
Next step is to assign uploaded virtual machine package to slot, so we can run it. In order to do that click on RSP Slots.
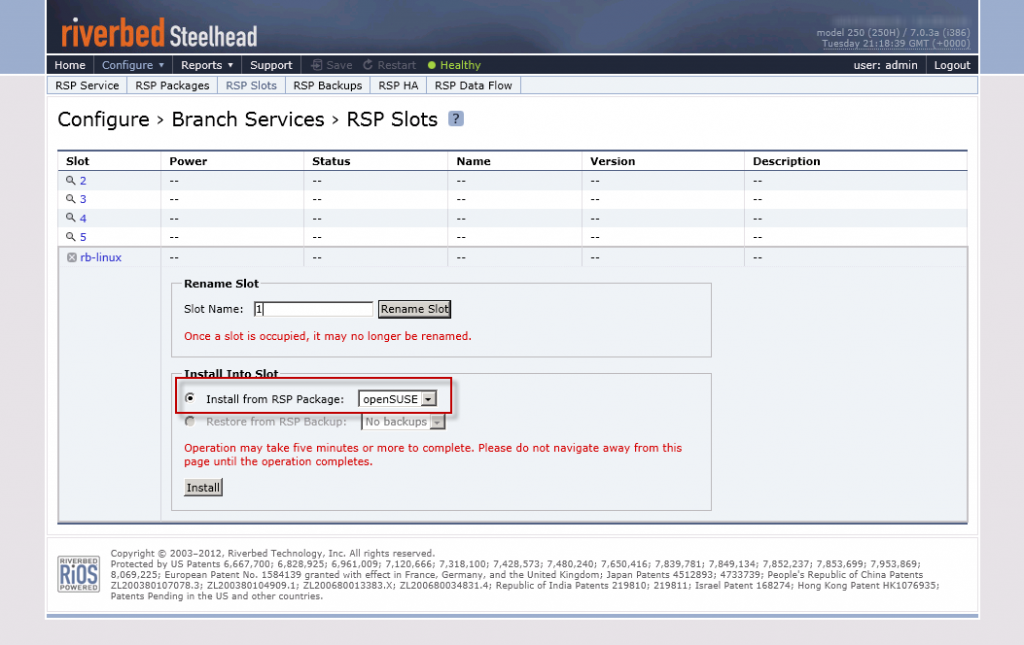
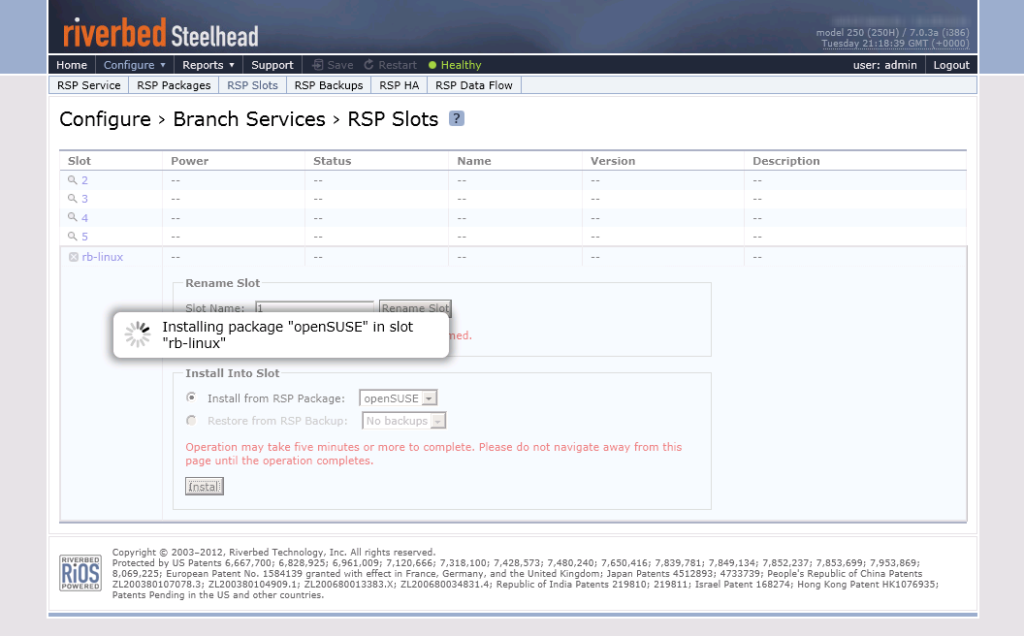
In slot configuration in Install Into Slot section indicate package which will be assigned to the slot by choosing it from Install from RSP Package list (which should containt name assigned to package when uploaded to Steelhead appliance).
Riverbed will show information that package is being installed in particulat slot.
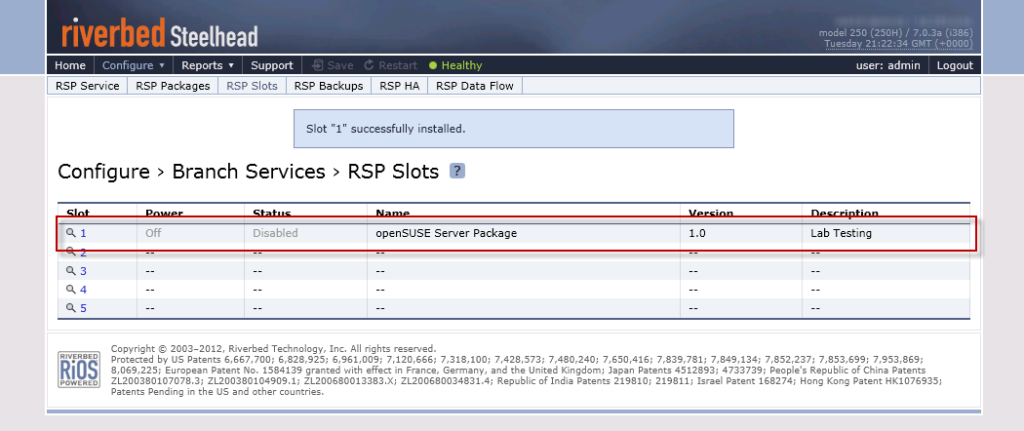
And after the while we can see that uploaded package has been installed in one of the slots.
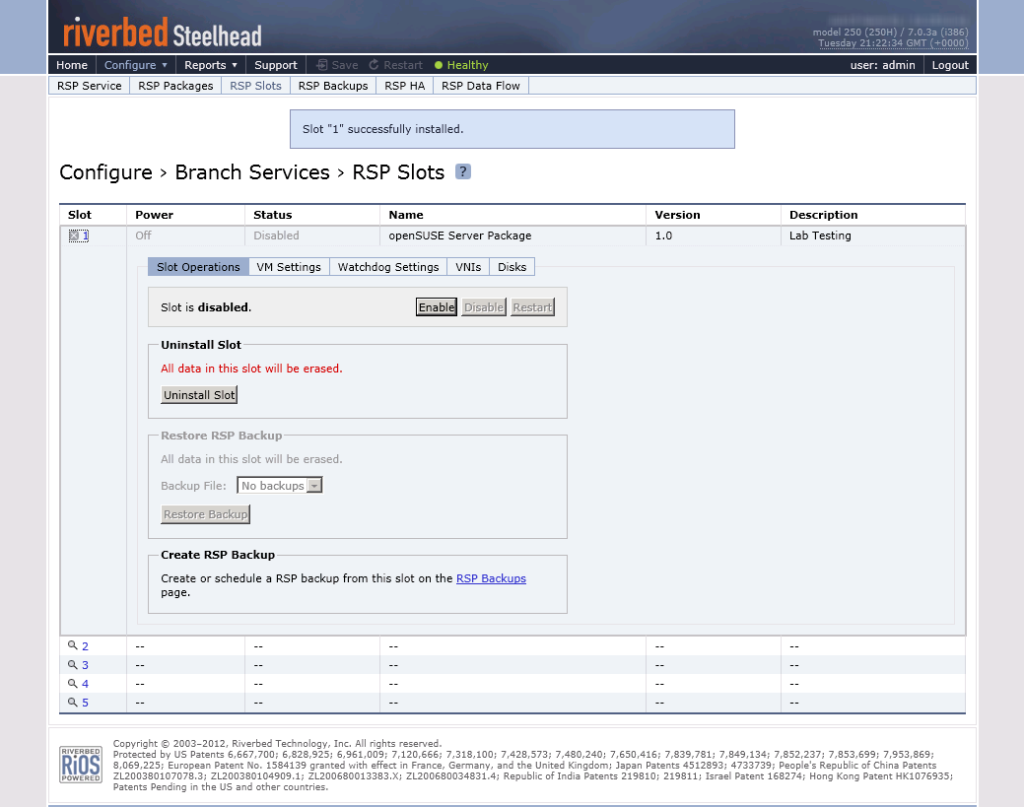
Once package with virtual machine is assigned to slot we can enable slot by clicking Enable button. When you have proper license installed you can now run virtual machine and enjoy additional functionality on Riverber Steelhead appliance.
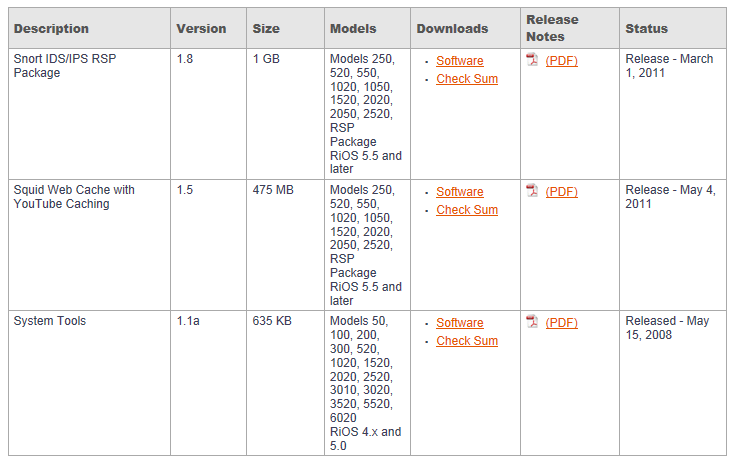
On Riverbed Support portal you can also find ready to go packages with virtual machines, which can be downloaded and used on Steelhead applianced.
I hope this article demonstrated how to create and package virtual machine for use on Riverber Steelhead appliance. Remember that RSP is very powerful tool and allows to deliver many additional services with Riverbed Steelhead.



Very nice article. many thanks to the author.
First allow me to say thanks for the information you provide, I really appreciate it. I have followed your steps when and they were going fine but when i create the package using RSP Package Creator, while it creating the package it gives me “error opening file for reading: cache” then it stop. I use Window 7, Vmware workstation 9 and RSP Package Creator 2.1 just like yours, but i couldn’t understand why it gave me that error.