In one of the previous articles I did quick overview How-to Install vSphere Hypervisor ESXi 5 on VMware Workstation 9. One of the reasons I did that in my Lab environment was to run Cisco Nexus 1000v with NX-OS on it and evaluate this operating system and how it can integrate with other products. So, here is quick overview how to make Cisco Nexus 1000v happen on vSphere ESXi.
First of all we need to get Cisco Nexus 1000v with OVF template for ESXi. It can be found in Nexus1000v.4.2.1.SV1.5.1a.zip archive on Cisco Support & Download webpage. Prior to download you need to create account on Cisco web page as login is required to get to file.
Once zip archive is downloaded un-compress it. I did unpack it to F:\ISO folder. Once it’s done you can find OVF (Open Virtualization Format) file which contains information about virtual appliance and how to deploy it.
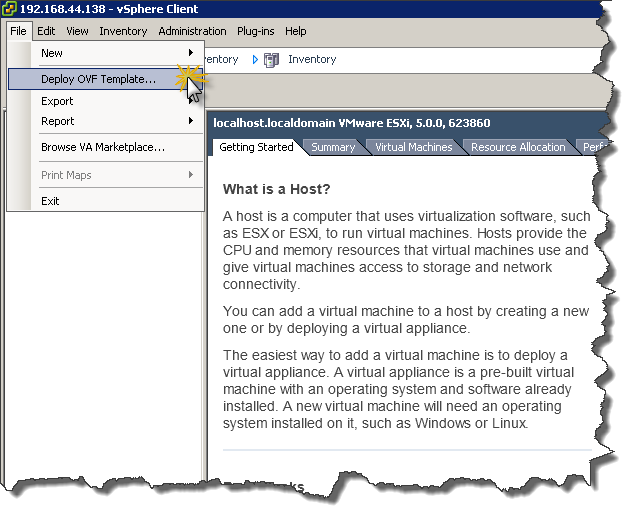
Now, we run vSphere Client, connect to ESXi and from File menu click Deploy OVF Template…
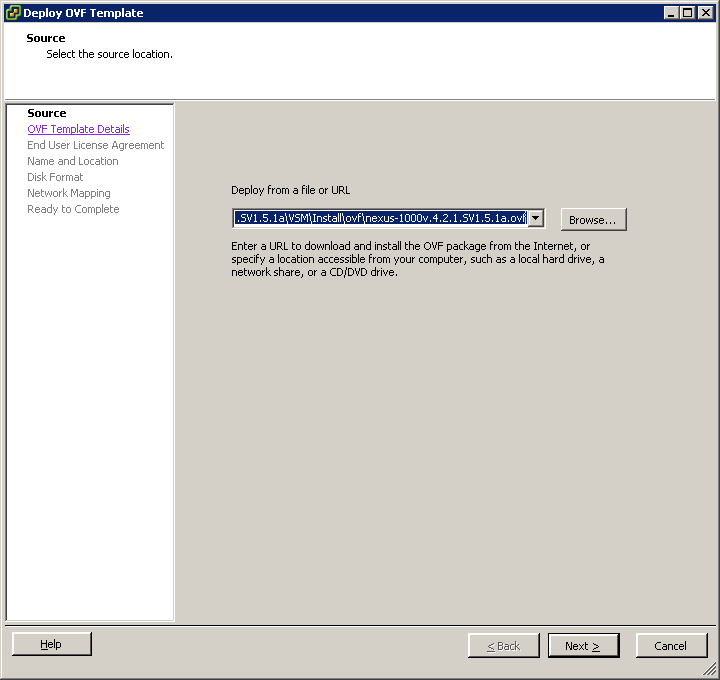
As source indicate file extracted from zip file, F:\ISO\Nexus1000v.4.2.1.SV1.5.1a\VSM\Install\ovf\nexus-1000v.4.2.1.SV1.5.1a.ovf and click Next to proceed.
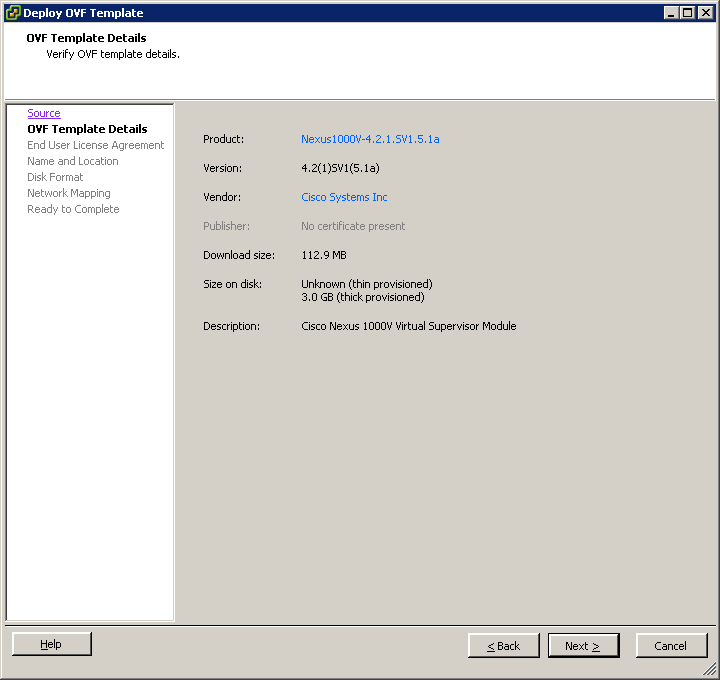
Following screen will show OVF Template Details with information about virtual appliance we deploying. As we can see on screenshot appliance which we are about to deploy is Cisco Nexus 1000V. All detailed information about versions is also presented. Click Next to proceed with deployment.
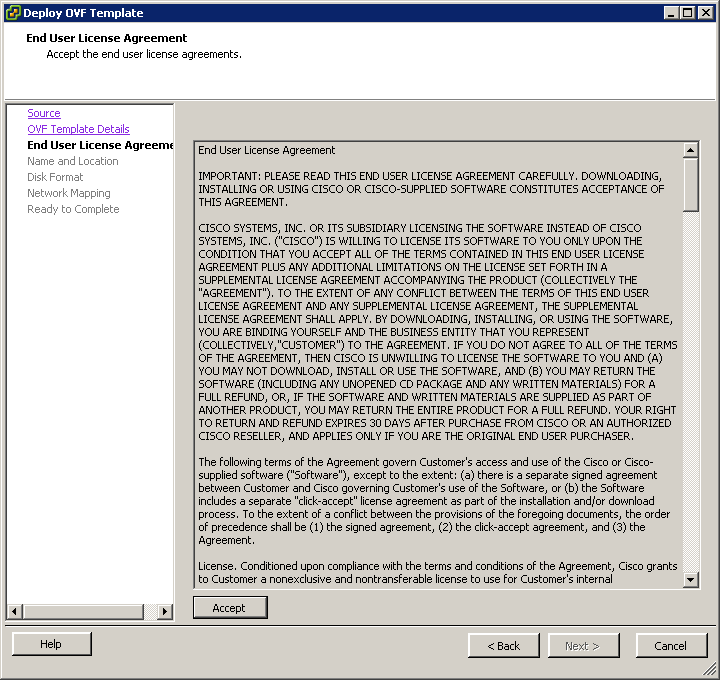
Following screen presents EULA, which we have to agree to proceed. So, in order to continue click Accept and then Next.
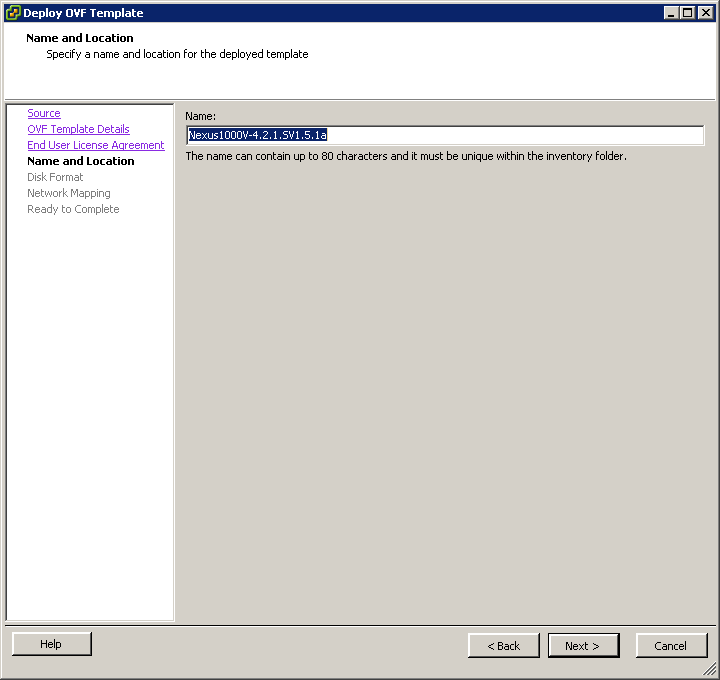
Once EULA agreed, we can assign name to virtual appliance. Default name is proposed by Deploy OVF Template wizard, so I will stick with name proposed and click Next to proceed.
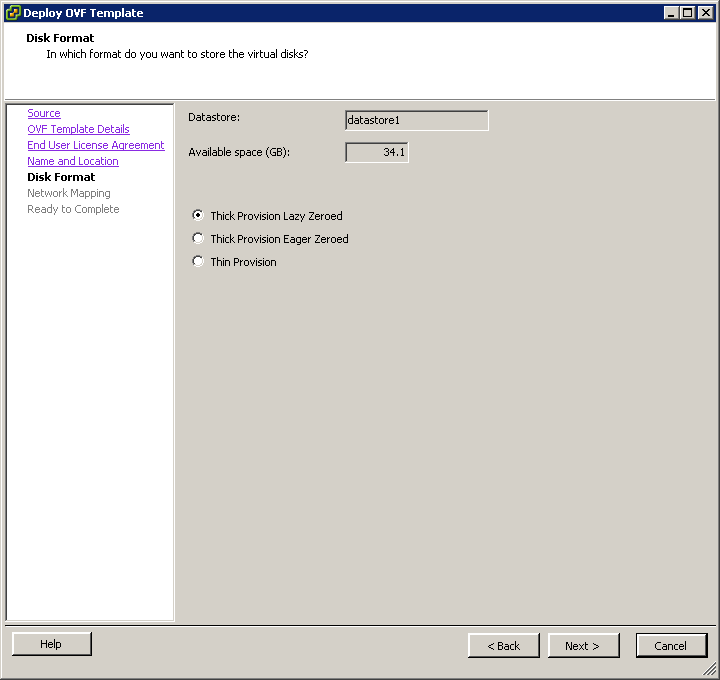
Now we can decide about format of virtual disk for our appliance. I have only one datastore, so virtual machine will be automatically placed there. Once all parameters defined click Next to proceed.
As per VMware documentation few words about disk format for virtual appliance
- Thick Provision Lazy Zeroed – Creates a virtual disk in a default thick format. Space required for the virtual disk is allocated when the virtual disk is created. Data remaining on the physical device is not erased during creation, but is zeroed out on demand at a later time on first write from the virtual machine. Using the default flat virtual disk format does not zero out or eliminate the possibility of recovering deleted files or restoring old data that might be present on this allocated space. You cannot convert a flat disk to a thin disk.
- Thick Provision Eager Zeroed – A type of thick virtual disk that supports clustering features such as Fault Tolerance. Space required for the virtual disk is allocated at creation time. In contrast to the flat format, the data remaining on the physical device is zeroed out when the virtual disk is created. It might take much longer to create disks in this format than to create other types of disks.
- Thin Provision – Use this format to save storage space. For the thin disk, you provision as much datastore space as the disk would require based on the value that you enter for the disk size. However, the thin disk starts small and at first, uses only as much datastore space as the disk needs for its initial operations.
Source materials: ESXi and vCenter Server 5 Documentation
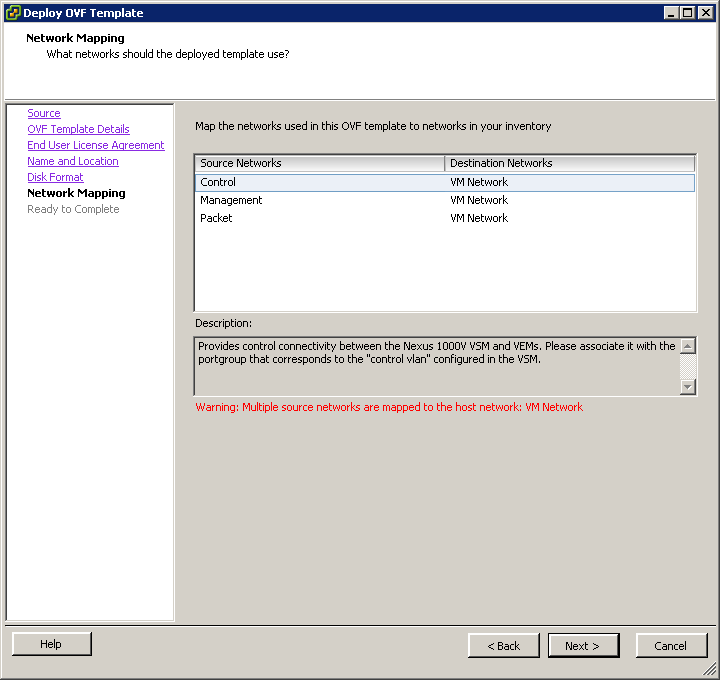
Our virtual appliance with Cisco Nexus 1000v has by default 3 network interfaces. We can assign them to virtual networks. As I have only one virtual network defined on my ESXi (VM Network) I will assign all interfaces to same virtual network, then click Next to proceed.
It is not recommended to connect all interfaces to same virtual network. I do that in the example for demonstration purposes.
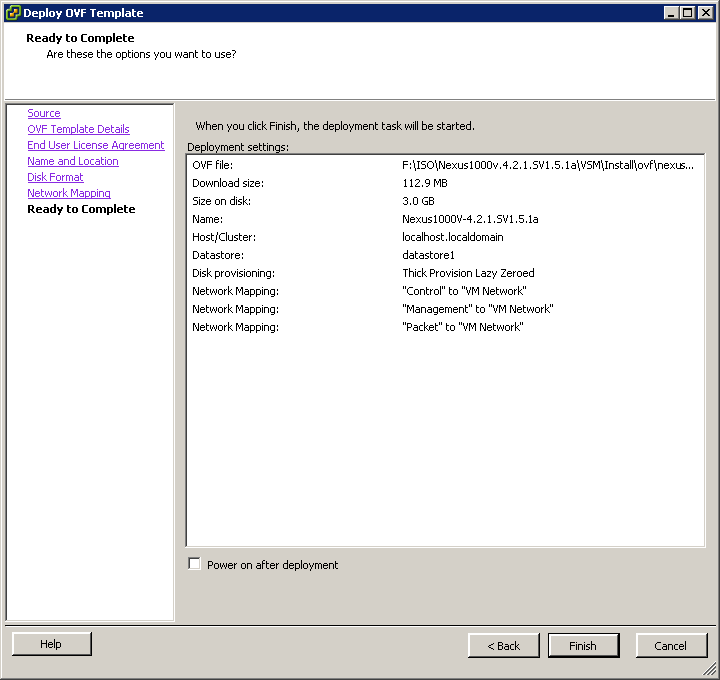
Summary screen shows all parameters of our virtual appliance. Once we click Finish Cisco nexus 1000v appliance will be deployed on ESXi as virtual machine 🙂
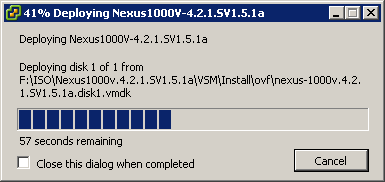
Progress bar will show how far we are from deployment to be finished.
And once done we can click Close to close Deploy OVF Template wizard.
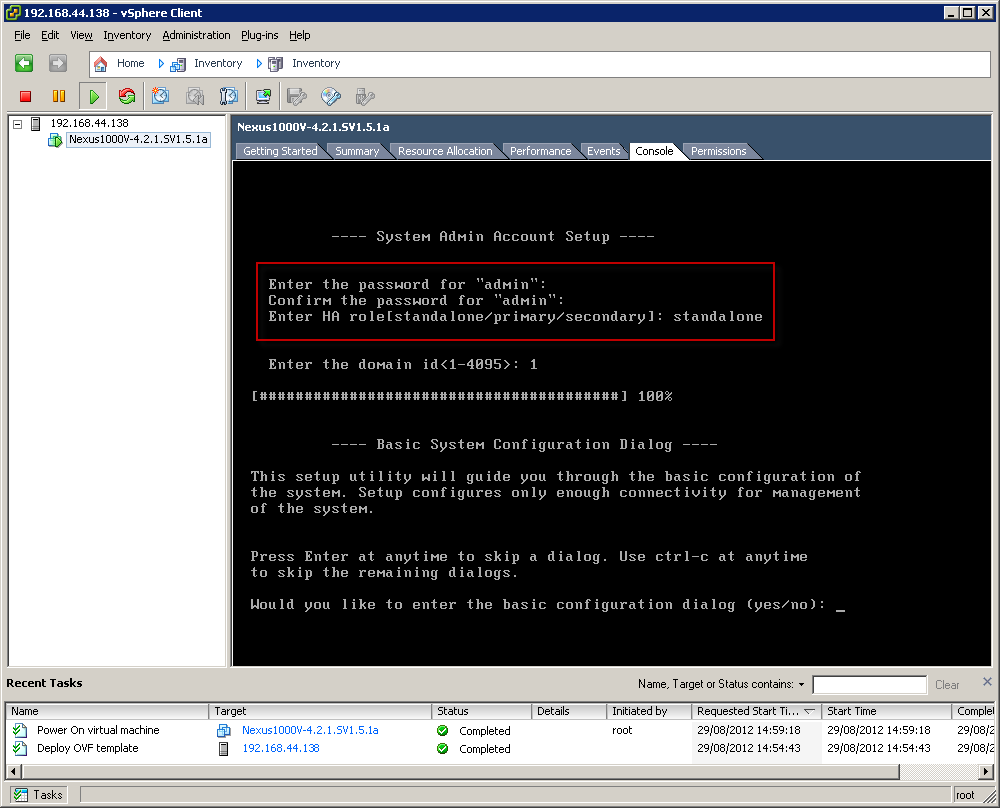
When virtual appliance will be powered on Cisco Nexus 1000v will boot up. Because this is first boot after a while system will request to set admin password. Enter password of your choice. This password will be used later in order to access Cisco Nexus appliance. Once password is provided and accepted Nexus is asking about deployment model. As this is for simple lab purposes I do not plan on HA (High-Availability), so it’s standalone role.
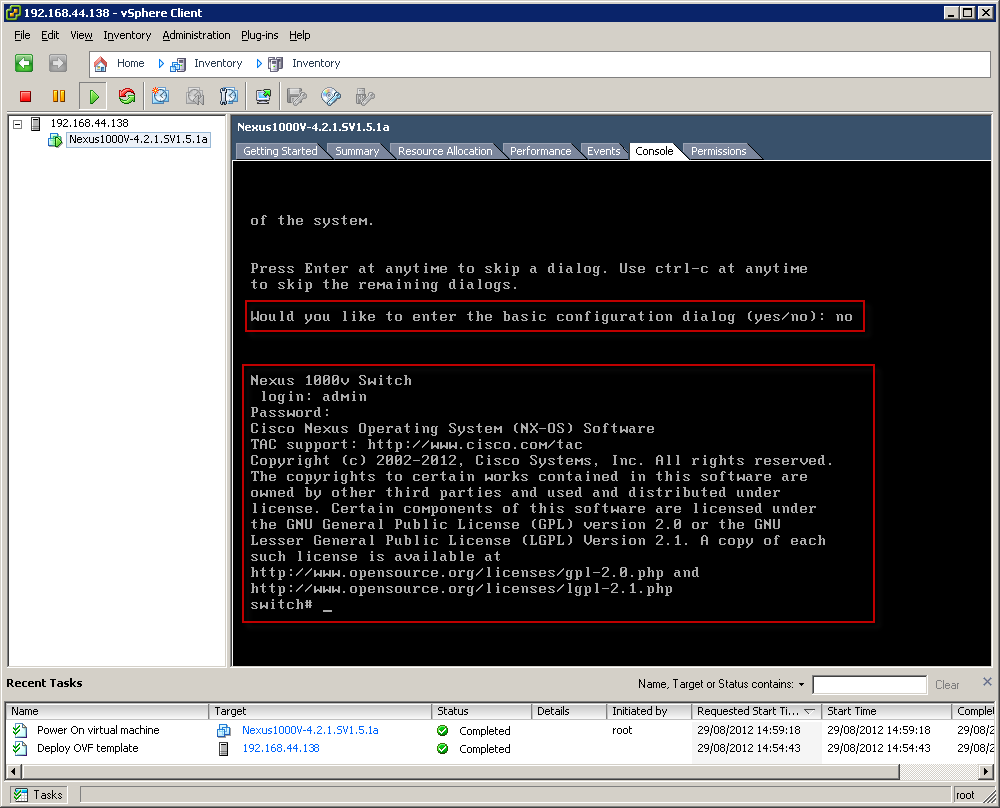
Once password and deployment model is confirmed Cisco Nexus will boot up and asks if you want to go through basic configuration dialog (yeah… I guess well known question from Cisco :)). When you answer no Nexus will ask for username and password and once provided (username is admin and password as we setup in previous step) Cisco nexus 1000v is ready for experiments and testing 🙂
Now I have to figure out what I can do with Cisco nexus 1000v installed as virtual appliance on ESXi which is installed as virtual machine on VMware Workstation 9.0 🙂
If I will come up with something I might write about that 🙂

